Makeup for most of us has been put on the backburner this year, and I welcome the change. This shift has allowed me to spend more time caring for my skin so much so that I’m starting to prefer to see myself sans makeup even with all of my imperfections. But as we close the year, I thought it might be fun to put together an NYE look even if we’ll be sitting in our PJs, eating take-out, and binge-watching a new show as we wait on the clock to strike midnight. This idea came to me as I was escaping and simultaneously trying to get myself into the holiday spirit watching the queen of Christmas—I mean Mariah Carey’s Magical Christmas Special on Apple TV+ with a cup of hot cocoa topped with marshmallows.
As she stood by the grand piano and sang, I couldn’t take my eyes off her blingy, glamorous gold eye makeup look. All that glitters is gold in my world, and I wanted to try and recreate this look. I took to Google and researched glitter eye makeup products. One product that kept coming up and had rave reviews was NYX Professional’s glitter. The glitter has hundreds of five-star reviews and is budget-friendly at that.
Going glam for the new year might feel pointless since we’ll be ringing in the new year at home, but if you find yourself in the mood to add some sparkle to your NYE evening, here’s how I created my look.
Before

Even out the skin tone
First, I started by evening out my skin tone with concealer. Before applying my concealer, I prepped my skin with my two daily serums: The Ordinary’s Hyaluronic Acid 2% + B5 and MAELOVE’s The Glow Maker. Next, I primed my skin, including my eyelids, with Grown Alchemist’s Anti-Pollution Primer. If you’ve ever watched a makeup artist give a tutorial, they always say skin prep is what makes any makeup look it’s absolute best—and I agree.
Next, I applied my NARS concealer in Hazelnut and Chocolat to smooth my hyperpigmentation and layered with two dots of Rare Beauty’s blush—one on each cheek—in Joy to the apples of my cheeks to brighten my face. Trying this product made me fall in love with using blush again. My skin gets an instant mood boost even on days that my lack of sleep or stress is written all over my face.
Start building the base
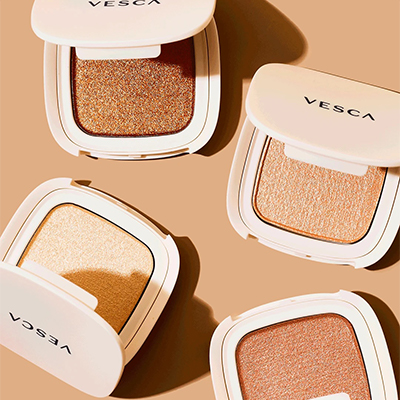
Now that my base is set, it’s time to get to the eyes. First, I started with Fenty Beauty’s Sun Stalk’r Instant Warmth Bronzer in Mocha Mami. This bronzer adds depth and contour to my eyes while looking natural. Next, I followed up with Vesca Beauty’s Stargaze Luminous Glow Highlighting Powder in Dream. If you notice, I haven’t used anything that is a traditional eye shadow, and I find that works well for me because I love multitasking products.
Prim the eyelids and apply your bling
My final and most transformative step was adding the glitter. Before packing the glitter on, I applied NYX’s Glitter Primer. When using loose glitter, it’s important to ensure the sparkly specks adhere to your lids. I used a flat eyeshadow brush to pat a generous amount on my lids and waited a few seconds for it to get tacky before applying the gold glitter. As I placed the glitter on the lids, there was a little fall out onto my face, but it was minimal. To control the glitter’s placement, I poured the glitter onto a paper towel and slowly layered it onto my lids until I got my desired result with a flat eyeshadow brush. I followed up with a little liner, mascara, and a bold faux lash from LoveSeen to bring the look full glam.
After

What I enjoyed the most about putting this together is that I really didn’t need to buy much outside of what I already had, excluding the primer and eye glitter. I also found my final look to be pretty subtle for a gold glitter look. If blingy eyelids aren’t your thing, try putting together a look with a few of the staples on your vanity—maybe try one of the shadows from your palette you haven’t tried because it felt too glam for every day. Get creative. Have fun. I found this little bit of me-time cathartic, and I hope you do too if you take time to build out this look.
The post How to Try a Glitter Eye Look appeared first on The Everygirl.


Post a Comment
Note: only a member of this blog may post a comment.