October 2020

Hey guys, Josie here. I know I already have the infamous reputation of the crazy Will-Try-Anything-For-Good-Skin Lady, but hear me out on this one…

Your favorite natural sweetener and Prince Charles’s favorite tea add-in is actually the secret to the skin of your dreams. That’s right, honey is truly the Taylor Swift of the beauty world — it’s been around forever, and, though there’s been some controversy, it remains the queen of DIY face masks and soothing body lotions (okay so that’s not really Taylor Swift related, but you get where I was going with that analogy, right?).

Note: not all the sweet stuff on the shelves has the same outcome. Stick to Manuka honey or raw honey — the other stuff (including the cute teddy bear shaped bottle) has loads of added sugar (which will clog pores and lead to breakouts) and less antioxidants. But when you stick to the natural stuff, it’s a game changer. Read on to find out about my experience washing my face with nothing but honey for two weeks.


Benefits of Honey on the Skin

  • It has antibacterial and anti-septic properties, so it gets rid of dirt and bacteria, perfect for both preventing and treating acne
  • It’s full of antioxidants and boosts collagen production—two things that are MVPs in preventing aging and boosting glow
  • It’s extremely moisturizing and hydrates even the driest of skin.
  • Honey is naturally soothing and has healing properties (it was traditionally used on wounds to aid healing!). It also nourishes damaged skin to fade scars (like those pesky acne scars!).
  • It works as a clarifying agent because it naturally opens up pores, making them easier to unclog.
  • The enzymes work as a gentle exfoliator, sloughing off dead skin cells and leaving you with a radiant complexion.


My Experience

So I’ve never had troubled skin per se, but I’ve always been on a constant journey for the glowiest, clearest skin ever (because we all should be dreaming big, right!?). Hormonal acne, pesky blackheads, and dark under eye circles have been the extent of my problems. That is, until this year — as Chicago’s brutal winter arrived, so did the worst skin woes I’ve EVER experienced (not to be dramatic…). It started when I woke up with severely itchy skin, which I innocently blamed on the changing weather. It then became red bumps all over my face, and a puffiness that was definitely not normal.

I knew it must be an allergic reaction, and, after talking to my dermatologist, got a prescription to keep the inflammation down. It momentarily helped, but the bumps, itchiness, and puffiness still came back every week or so. The worst part was I could not figure out what was causing it — I changed pillowcases, stuck to oils instead of retinoids in my nighttime skincare, and used sensitive wash instead of standard. And still, despite all my efforts and tears, it kept coming back like a Disney Channel theme song that gets stuck in your head. This was my Everest.

I decided I needed a massive lifestyle change. As someone who believes natural is always better (unless it’s Oreos or Kim Kardashian), I wanted to get rid of everything that might be harmful to skin — which included my trusty face wash. Even the supersensitive replacement I’d been using didn’t count as “natural.” So what could I replace it with? Enter: honey. I’d actually heard a lot of buzz (pun intended) about the stuff made by bees and its benefits for the skin. Face wash had been my security blanket for so long that it felt like a ginormous leap of faith to go without it, but I was excited to test out something so drastic (read: would try anything for good skin).


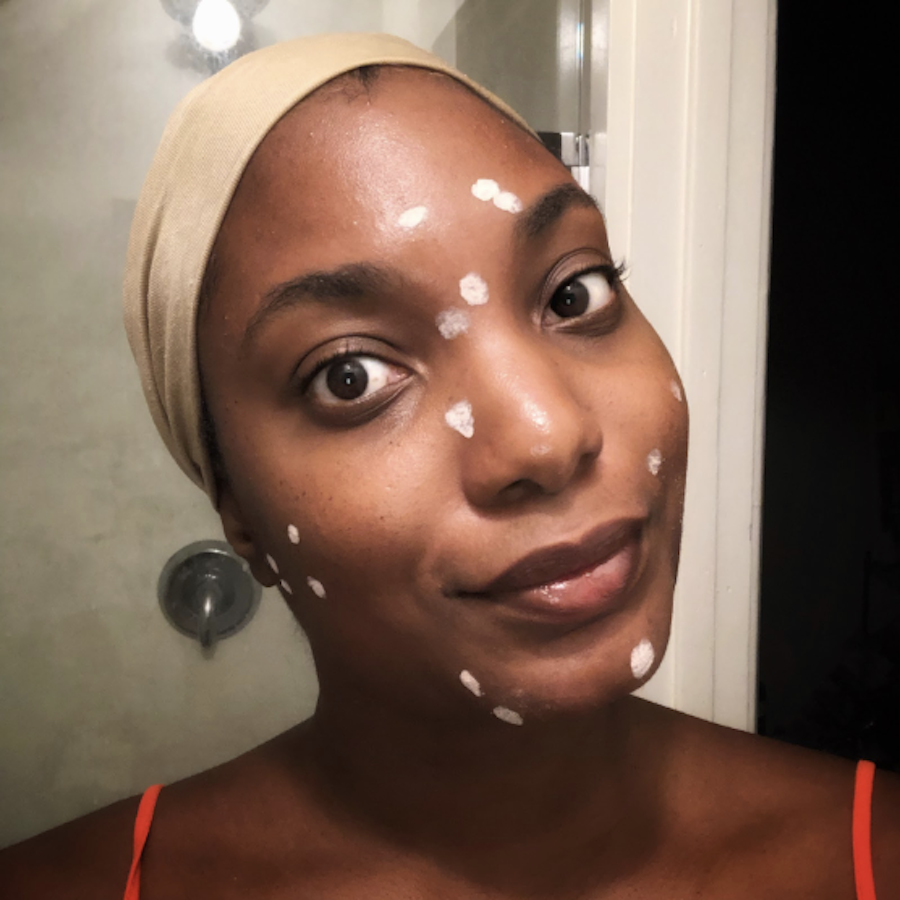
I planned to simply splash my face with cool water in the morning, and wash with honey at night. I also used Summer Fridays as an overnight mask (also natural) and massaged it in with a Clarisonic for extra hydration. The honey cleanup was way easier than I thought it would be. Raw honey is much thicker than the regular kind, which made it easy to spread on my skin. I rubbed it in for about a minute, and then kept it on like a mask for another minute or two as I got ready for bed. The first time, I was ready with a roll of paper towels and backup face wash, but with just a splash of water, the honey melted away and washed off like a piece of honeycomb cake.

The only change up was when I wore makeup — the honey wasn’t enough to take off all mascara and eyebrow gel galore, so I opted for a natural cleansing oil as the first step, followed by the honey. Two weeks and a jar of honey later — my skin has NEVER. BEEN. BETTER. I repeat — I HAVE ALMOST ACHIEVED SKINCARE NIRVANA.


Let me break it down: the honey did not clog my pores or cause acne as I had worried. I’ve actually remained fairly clear-skinned with a few smaller zits popping up here and there, but not as many as I normally would during a period week, especially, which was a #miracle. But the biggest shock of all… after washing with honey, the pesky, horrible, seemingly permanent blackheads I’ve struggled with on my nose FOR. FREAKING. EVER. popped out so easily, just like that! (not to be graphic)

Overall, my skin just looks more even-toned, glows, and has actually survived winter, dryness-free. *Knock on wood* but my red bumpiness and itchy skin has not come back since I started washing with honey. To be clear, I don’t think using face wash was the problem. I just think honey is that good that it helped heal and soothe my poor, sad skin. Plus, it came with a lot of other perks too. It truly was a miracle product, and to be totally transparent, I don’t think I’ll ever go back to standard face wash again. Not all heroes wear capes — sometimes, they come in a jar.


Would you try washing your face with honey? Tell us in the comments below.


This article was originally published on January 2, 2019.

The post I Washed My Face With Only Honey for Two Weeks appeared first on The Everygirl.

We’re big fans of the YouTube Beauty Community here at The Everygirl. We’re constantly talking about our favorite creators, their best looks, and buying pretty much everything they recommend. The YouTube beauty world is honestly what we have to thank for some of the biggest trends in beauty—we’d never be baking our undereyes or curling our hair with straighteners or using men’s post-shave balm as a primer if it weren’t for the beauty YouTubers who taught us how. 

Alongside the various techniques YouTube has taught us, the phenomenon of the ever-so-popular “empties video” has truly taken over our subscription feeds. Every beauty YouTuber has made an empties video (if not five), and everyone who even knows just a glimpse of beauty YouTube has seen one. The concept is simple: show everyone what’s in your trash and talk about if you loved it, if you’ll buy it again, and how long it took you to use up. 

So being the beauty-lovers we are at TEG HQ, we decided to create our own empties series. Every month, all of our editors will share a few of our own empties—from skin, hair, and makeup products to candles and vitamins and home items—and give our unfiltered review on each of the products. Some of them we’ll love and need to repurchase ASAP … and some we’ll celebrate finally finishing them up. If you’ve ever wondered what our absolute favorites (and not-so-favorites) are, this is the right place to be. It’s finally time for our trash cans to shine!


TATA HARPER

Illuminating Moisturizer

Living in a cooler climate with combination skin requires me to be very diligent about the moisturizers I use on my face. I am a huge Tata Harper fan and have been using this product for 2+ years as my day moisturizer. While pricey, I mix two pumps into my tinted moisturizer daily and find that my skin is both well hydrated and glowing! A little goes a long way and it’s so worth the investment.

Primally Pure

Lavender Deodorant

I made the switch to natural deodorant back in 2017 and haven’t looked back. Primally Pure is the most effective that I have tried, and I set up the automatic subscription so I get a discount while making sure I never run out! The lavender scent is my favorite, but all of them are lovely.


Alchemy Body Shop

Luna Body Butter

The season has come where just applying lotion to my dry skin isn’t enough. Having another layer of moisture on my skin will definitely help this fall and winter, and this body butter from Alchemy Body Shop is the perfect first line of defense. Once I hop out of the shower, I apply this vegan body butter while damp and it compliments my lotion so well. It’s so moisturizing, you might want to be beware of sliding out of your towel! It even came with a cute personal note from the owner, which was a great touch. This is definitely a new staple product in my arsenal.


Luminous Ceremony

Cream Cleanser

Finding the right cleanser for my skin is a lot more complicated than one would think. The wrong face wash means breakouts and tight, irritated skin, which makes me wonder why I don't stick to my cream cleansers with calming ingredients. Ranavat's cream cleanser removes makeup and oil while keeping my skin balanced. Each time I have a breakout or over-exfoliate (which is at least once a month), it's Ranavat to the rescue. This cleanser will always be in my medicine cabinet.


Orgins

Original Skin Retexturizing Mask with Rose Clay

The amount of oil my skin produces routinely shocks even me, so I have to frequently suck some of it out with my beloved clay masks. Of my collection, this Origins one is a fave and frequent repurchase. I slather it all over my face on Sundays, wait 20 minutes, and then hop in the shower and I notice such a difference in the softness and glide to my skin. It’s also great for a quick spot treatment for a really oily blemish you’ve got living rent free. Highly recommended.


Embryolisse

Face Cream

At the end of 2018, I went through quite a thing with sir Harry Styles. I mean, I’ve always loved him, but “Fine Line” attached to my soul in ways I can’t even describe. The whole album is rumored to be about his ex-girlfriend, model Camille Rowe. So, I went on a deep dive watching dozens of interviews and videos with her, all to discover that she is a lover of classic French pharmacy products and brands, like Embryolisse. I bought this immediately in an effort to have gorgeous Parisian model skin, and I’m not going to lie, it fits the bill. This is a thick moisturizing cream in a squeeze tube. It has dozens of uses, but my favorites are as a makeup primer (it really grips onto your skin and holds foundations well), a nighttime moisturizer, and as a sleeping mask when applied in a thick layer. I haven’t repurchased yet because I’ve been loving my Beekman 1802 Bloom Cream, but it’s on my list to reorder for the wintertime.

Thymes

Gold Pumpkin Scented Candle

It’s rare that I want a sweet, pumpkin-scones-straight-from-the-bakery scent, but now that I’ve tried this, I know I’ll likely never need another (except ”Pumpkin Chai” by Nest , which I love describing as the most sophisticated pumpkin scent on earth… which might also explain the price tag). This is a pretty small candle, but it actually burned well and for a long time considering. I like sweet scents in my kitchen to make it always smell like baked goods when I step in to fill up my water bottle or peruse for a snack, and this little candle was the perfect treat to light during the day.

Bath & Body Works

Leaves Candle

It is candle season, y’all, and I blew through this guy in a matter of a few weeks. I know there are some Leaves haters out there, but this candle is the most quintessentially fall scent there is. I love a fancy candle as much as the next girl, but when I just want my apartment to smell like there’s an apple pie in the oven (with freshly-picked apples from the orchard, of course) as I’m doing arts and crafts at the counter with cinnamon-scented pinecones, all while a campfire is blazing behind me, I’m going with Bath and Body Works’ “Leaves.”

L'Oreal Paris

Wonder Water

I picked this up at Target after reading Maddie’s rave review on TEG. I absolutely love this product and think it rivals expensive deep conditioners and leave-in treatments on the market at half or a quarter of the price. However, I’ve suggested this to dozens of my friends with thick and even medium hair, and they’ve all hated it and felt like it did nothing. My hair is baby-fine and thin, and I don’t have a lot of it, so if you have a similar hair type, this might be the perfect conditioning treatment for you that won’t weigh hair down but leaves it silky and shiny. I will also note that I go through this—as the name would suggest—like water, but at the price point, I don’t mind reupping my supply every couple of months.


EltaMD

Facial Sunscreen SPF 40

This is my fourth bottle of I can confidently say I will never go without this in my skincare arsenal. I’ve sung its praises before, but this product makes me actually want to wear sunscreen. It’s non-greasy, goes on clear, and sits perfectly under makeup while keeping my skin hydrated. It also doesn’t hurt that my actual dermatologist recommended it to me and you can buy it on Amazon. If you’re trying to get yourself to be in the habit of wearing sunscreen every day, try this out—you won’t regret it.


Fur

Silk Scrub

I never knew I needed a scrub specifically for the areas I shave, until I tried this Silk Scrub. This exfoliating treatment is gentle, soothing, and smells delicious, and using it has become the moment I look forward to most when I shower. I put it on my underarms and leave on as a mask throughout my shower and then keep it on for a shaving cream when I shave at the end to avoid razor burns and get smoother skin. It has also helped me avoid bad razor burns, nicks, and irritation I’ve always gotten on all ~sensitive areas.~ After years of awful razor burns, it really shouldn’t be this easy to have silky-smooth hairless skin, but alas, Fur Silk Scrub is here to save us all. It’s gentle enough to use on sensitive areas (even after shaving!), buff dead skin cells before shaving for a smoother shave, or it can be used as a scrub and mask underneath hair if you do feel your best with some body hair. I will absolutely be purchasing again because I ran out a week ago and am already missing this amazing scrub. My underarms are just not the same!


Dior

Miss Dior Blooming Bouquet

This Miss Dior Blooming Bouquet perfume has been there for me over the last two years during some of my favorite outings. It’s not cheap (as with most high-end, potent perfumes), so I used it sparingly but, whenever I did, I’d get so many compliments. I’m quite melancholy to see this go because it’s such a perfect light, floral perfume, but I’m still deciding if I’m going to use my money to replace it (which would be a safe option knowing that I love it) or to invest in another scent. Stay tuned!


Want more empties? Check out the previous months below!

September 2020

August 2020

May 2020

April 2020

March 2020

February 2020

January 2020

The post October Empties: Honest Thoughts on The Products Our Team Finished This Month appeared first on The Everygirl.

In 2005, I decided to cut off all my relaxed hair and go completely natural. I didn’t have the patience to grow out my natural texture, so I immediately did a big chop. I went from shoulder-length, relaxed hair to two inches of natural hair in a matter of a couple of hours. 

I actually had no idea what my hair would look like without a relaxer, but I knew I was tired of my dull, lifeless hair. I was unwilling to get a relaxer every 4-6 weeks; to burn my scalp and spend the next few weeks trying to cover up the burn scars. I was ready to explore what was naturally given to me and all that came with my new hair journey. 

On the day of my big chop, the hairstylist took such good care of my new hair, but now it was my turn to figure out how to maintain my new healthy, natural hair. I was living in Philadelphia at the time, so there were tons of Black hair stores for me to grab some new products. I naively thought I would go in, head to the natural hair sections, and grab what I needed. Who was I kidding? It was 2005, and the only products I saw on the shelves were Carol’s Daughter. I bought what I could and began experimenting to see what worked and what didn’t work on my hair. 

Those initial products served me well, but as I learned more about natural hair, I knew I needed more from my products. I had spent all my life relying on other peoples’ products to take care of my hair. I wasn’t getting the results (growth, moisture, minimal frizz) that I was looking for, so I began to make my own products with ingredients in my kitchen. I heard from a hairstylist once that “if you can’t eat it, it doesn’t belong on your skin and hair.” I wanted to take care of my hair in the most natural way possible, so I took her statement to heart and began creating simple recipes to support my hair journey. 

Experimenting with creating my own products allowed me to really get to know my hair. I learned what I needed and how to take care of my natural hair on my own terms. Each week I would spend time creating products to see how they would work on my hair. One week, I would try something for moisture; another week, I would create a styling product; and then another week, I would create something for growth. Don’t get me wrong, I’ve made a lot of mistakes, but it was important to spend time with my hair. I spent so much time in my younger years manipulating my hair to be something that it wasn’t. When I began to wear my natural hair out and proud, I didn’t want to miss out on experiencing my hair in all of its shapes and forms. Creating DIY haircare products was and is an act of love for me. If you’re like me and feel like you’ve tried every product out there and still aren’t reaching your hair goals, it might be time to try your hand at these DIY natural hair recipes:


Deep Conditioning Banana Hair Mask

Bananas are so helpful for your hair. Whether you are looking to add moisture into your strands or trying to grow your hair past your shoulders, bananas have you covered. This is the banana hair mask that I use, but feel free to mix it up to suit your needs. 

What you need:

  • 1 Banana
  • Water
  • Optional add ons—pick 1 or 2: egg, honey, coconut oil, avocado
  • Bowl
  • Fork or hand mixer to mix

Directions:

  1. Take a ripe or even over-ripe banana and put it into a bowl. 
  2. Mash banana completely so there are no chunks left. 
  3. Add enough water so that the mixture is easy to apply to hair. You will want a loose paste consistency. 
  4. If you are adding in any of the bonus add-ins, put them in the bowl and incorporate them. 
  5. Apply the mixture on dry or slightly damp hair and coat the hair completely
  6. Put on a shower cap to cover hair and protect your clothes
  7. Pro tip: add a heated bonnet or wrap your hair in a warm towel
  8. Let the hair mask sit on your hair for 15-20 mins. 
  9. Rinse thoroughly before you begin your wash day routine

I’m obsessed with how much moisture and shine bananas give my hair. Not only does the moisture last for the week, but this DIY treatment costs me less than $1!


Bentonite Clay Wash

OK, so you might not have bentonite clay in your kitchen, but this natural shampoo swap was a game-changer for my wash routine. I found most shampoos still left a film or residue on my hair. I have low-porosity hair and need my strands to feel really clean, and bentonite clay was the only product that truly cleaned my hair and scalp. 

What You Need:

  • ¼ cup of bentonite clay
  • ½ cup of water
  • Applicator bottle
  • Apple Cider Vinegar (optional)

Directions:

  1. Combine clay and water together in the applicator bottle
  2. Shake to combine completely
  3. Apply to your hair as you would a traditional shampoo
  4. Softly massage your scalp to remove any product residue
  5. Rinse and moisturize with your conditioner of choice

Bentonite clay can be a bit drying, so make sure you follow up with a deep conditioner to help balance out your strands. After a clay wash, I know my hair is beautifully clean. If you’ve noticed that your shampoo isn’t really cleaning your hair all the way, you may want to try and swap your shampoo for a simple clay wash. Having a styling gel that actually works for me opened up so many new styling options. Today there are tons of flaxseed gel options on the market, but you will often find tons of ingredients that your hair probably doesn’t need. This three-ingredient gel is as natural as it gets.  


Flaxseed Styling Gel

I have such a hard time with gels and styling creams. I find that they either make my hair hard as a rock or super frizzy, and neither of those results is a good look on me. Making flaxseed gel has become a staple routine in my house. Flaxseed gel is the perfect combo of control and softness that keeps my wash ‘n go style looking good for the whole week. Below is my recipe and if you would like a bit more help making your DIY flaxseed gel use this link.

What you need:

  • ¼ cup of flaxseed
  • 2-3 cups of water
  • Small saucepan
  • Pantyhose
  • Bowl or glass measuring cup
  • Optional: Rosemary essential oil (5-10 drops)

Directions:

  1. Add water and flaxseed into a pot
  2. Turn on the stove to medium-low heat
  3. Bring mixture to a simmer and continue to stir
  4. Simmer until the mixture becomes similar to a gel consistency
  5. Take off of the stove and let it cool 
  6. Drape stocking over bowl or glass measuring cup
  7. Pour flaxseed gel into the stocking
  8. Release stocking from the bowl
  9. Squeeze the liquid out of the stocking until only the flaxseeds are left inside of the stocking
  10. Discard flaxseeds
  11. If doing so, add the rosemary essential oil and stir to combine
  12. Pour in a mason jar or any jar with a lid
  13. Store in fridge

Since my big chop 15 years ago, the Black natural hair market has exploded. You can find complete aisles dedicated to natural hair. I have tried most brands on the shelves today, yet I still come back to my DIY haircare swaps. We as Black people have fought for the right to wear our hair as we wanted. So whether you buy commercial products or decide to use some of these DIY swaps, your hair is beautiful in any length, texture, or style. To my natural hair community: all hair is good hair. Wear it out, wear it proud. 

The post 3 DIY Products for Natural Hair appeared first on The Everygirl.

After a summer of fun in the sun, I suddenly awoke a few weeks ago to the biggest surprise of my life: every ounce of moisture had been plucked from my face, and I was, once again, a dry-skin sufferer. It seemed like out of nowhere, my skincare routine was entirely wrong for my skin type, as my once oily face needed as much hyaluronic acid, thick creams, and moisturizing ingredients as it could get. And I refuse to believe I’m the only one. 

We all know by now that the seasons changing can affect our skin big time, but until 2020, I never quite experienced it doing so practically overnight. Are you suddenly dealing with drier-than-normal skin this fall and looking for a quick fix (and maybe an explanation)?! We tapped the experts.


Why is my skin changing already? It was like 80 degrees last week!

Ashley Powers, Education Director and Medical Aesthetician at SpaDerma in Chicago, IL, explained that your skin can change as soon as the weather starts changing. For summer, that usually comes with the first days of high humidity. But for fall and winter, “that first crisp in the air when we start to see ~50° temperatures” might do the trick.


Source: Danielle Moss


I normally have oily skin, but now I feel dry. Why?

I couldn’t get enough powder this summer, so I didn’t expect my skin to really change with the weather this year. However, Dr. Purvisha Patel, board-certified dermatologist and founder of Visha Skincare, said that while the change in the weather makes a difference, so do our habits. “Skin in summer is “oily” not just due to sebum, but also stays moist from sweat and humidity,” Dr. Patel said. “When the weather gets cooler, we tend to take longer and hotter showers. The hot water evaporates easier from the skin, and there is no sweat or humidity in the air to help trap the moisture in. When the water evaporates faster, then the skin appears dry and tight.” 

We start changing up our habits and daily routines for the fall and winter, and those add up to affecting our skin as well. Dr. Patel suggested using a moisturizer like Visha Skincare RejuVenating Moisturizer or Face 2 Feet Body Balm after taking a shower or bath when the skin is still damp because it’ll help prevent all of that water loss and keep the skin supple and moist. She also recommended upping your water intake, especially to make up for all those pumpkin spice lattes we’ve been drinking.


How does the skin usually change? 

Dryness might be about more than patches of dry skin or itchiness; there’s a lot that can happen when your skin lacks moisture. “With any change in [the] weather, you may notice more dryness or tightness, a bit of redness or flaking, or an increase in oil production,” Powers said. So if you’re noticing your skin feels dry after you get out of the shower, or you’re randomly feeling a little more oily than normal, you might be dealing with a bout of dry skin after all.


Source: @laurajadestone


If I have dry skin, how am I supposed to deal with EXTRA dryness?

Going from dry to extra or even ultra-dry is no fun. When you already feel like you can’t get enough moisture in your skin and it somehow comes back at you with flakes, redness, and irritation, throwing in the towel and saying “peace” to your skincare routine and slathering your face with straight Vaseline is tempting. 

Those with dry skin might have actually experienced a little relief this summer with the humidity levels, but their skin is lacking that now and responding accordingly. Dr. Patel recommended increasing the thickness of your moisturizer—such as opting for a cream instead of a lotion—and reducing how often and how much you’re using exfoliating and dry ingredients like benzoyl peroxide, salicylic acid, and retinol. You can also add in an oil cleanser which will moisturize your skin while it cleanses and removes makeup as well as an extra moisturizing step, like a facial oil or hydrating toner or essence. 


Should I change my skincare routine?

“With the change in season, it’s important to change your products to what is best suited for your skin type at the moment,” Powers said. “A common phrase I say in the treatment room is to listen to your skin. If it is breaking out, then you may need to spot treat those breakouts; if it’s dry, add more moisture, etc.” If you’re noticing that your skin is changing, then the routine you were previously using might need some tweaks. You don’t need to overhaul every step, but it might be a good idea to change up the ingredients you’re doing. 

Powers is a dry-skin sufferer as well, and she explained that she changes up her routine quite a bit when the seasons change. She switches from a gentle cleanser to something more hydrating, like PCA Skin Creamy Cleanser, and adds a hyaluronic acid serum both morning and night. She also swears by PCA Skin’s Hydrate Mask; she said when applied 2-3 times a week, it’s a “lifesaver” during the harsh Chicago winters. 

If you love exfoliating acids like glycolic, lactic, and even retinol, don’t worry—you don’t have to forgo those ingredients entirely just because your skin is dry. In fact, Powers even recommends it. “When you have dry skin, you have dead skin cells building on top of one another (sorry for that visual) which causes dullness, flaking, and potentially congestion,” Powers said. “By gently exfoliating that dead, dry skin off, your skin will now be able to fully accept all the serums and moisturizers you are about to put on.” She suggested exfoliating with an acid like glycolic acid 2-3 times a week, depending on how sensitive your skin is. Dr. Patel loves ascorbic acid (AKA vitamin C), azelaic acid, and lactic acid for those with dry, sensitive skin looking to get a little bit of exfoliation. 

Powers also recommended adding hyaluronic acid to your routine, saying that everyone can benefit from a little bit of it in their routine. “Hyaluronic acid is naturally found in our body, so once you apply,  your skin knows exactly what to do with it,” Powers said. However, our body stops naturally producing it once we turn 25, and half of what we already have breaks down in our body by 50. “This is why as we age, we get a little drier and we lose that plump and smoothness to our skin,” Powers said. 

If you love your retinoid, the key to making it work with your dry skin is taking it slow, not applying it every day, and always finishing it with a really occlusive, hydrating moisturizer that will lock in the moisture. Peeling and dryness are often synonymous with retinol, but taking a few extra steps to hydrate (like using hyaluronic acid) can make all the difference. You can even apply moisturizer before and after retinol to dilute the product and keep your skin as moisturized as possible.


Source: @origins


Is there anything else I can do? I’m dyin’ here.

You probably know by now that the health of your skin is largely based on the health of your body. Both Dr. Patel and Powers recommended keeping hydrated from the inside out by drinking enough water every day (start with at least six glasses a day and go from there) and not skimping on your sunscreen (imagine sun damage on top of all that dryness… yikes). Dr. Patel also recommended getting enough sleep and taking a multivitamin and probiotic daily. 

If you’re able to get skin treatments, Powers said starting a chemical peel regimen is a good idea regardless of skin type. “I love peels so much because they are one of the only things we do that can correct multiple concerns in one treatment,” Powers said. “Whether you’re dry, acne-prone, or concerned with premature aging, there is a peel out there for you. Personally, I feel everyone should be on a chemical peel regimen as they are the best way to keep your skin healthy and strong.” If your skin is too sensitive or you’re not ready for the downtime, she recommended opting for a hydrafacial. On the flipside, if you want something a little more intense, microneedling can rehydrate, smooth, and brighten skin.

Powers highlighted the power of talking to a professional too. “There is so much misinformation out there about what people should use on their skin and what they shouldn’t, and there is no way to know what your skin needs until it has been properly assessed by a licensed aesthetician,” Powers said. “When someone comes in to see me for the first time, I always say, ‘Talk to me. What brings you in today?’… I find the best results happen when the client and I work together towards their goal.” Skincare isn’t about what you see influencers and celebrities using most of the time; it’s really about figuring out what is right for your specific skin, and that can often take time. If you’re struggling with dryness or any change in skin type this year, seeking the advice of an aesthetician or dermatologist is a good way to get your concerns voiced and tailor a routine for you.


SHOP THE STORY


The post Did Your Skin Just Become So Dry, or Are You Normal? appeared first on The Everygirl.

I have been dealing with hyperpigmentation since I was a kid. Obviously, as a child, I wasn’t getting marks from pimples, but any scrape, bite, or bump would leave me with a dark mark — I still have two scars on my forearms and forehead from my grade school days to show for it. Now, during my teenage years and into my early 20s, I had what I would have called “perfect” skin, which I took for granted, covering it up with what my sister called “too much” makeup. I have always been a product junkie, so I lived to try new cosmetics, but hadn’t mastered the less-is-more makeup philosophy just yet. 

But that changed for me at 25. Breakouts popped up all over my face, jawline, and neck. I was so embarrassed that I didn’t leave the house unless it was necessary — you know, like when I had to go do that thing called adulting to be able to pay my rent. To combat my breakouts and scars, I tried every drugstore and “must-have” prestige product I could buy, but I ended up with more breakouts — and once, even a chemical burn. You might be wondering why I didn’t just go to a dermatologist. Well, at the time, I didn’t have health insurance, so I was using the internet and product reviews to guide me. 

With those lessons in my mind, I now keep it simple even when I want to use every product I own to get rid of my hormonal breakouts. I know that I am not the only one dealing with hyperpigmentation, so I reached out to Rachel Roff, a medical aesthetician that specializes in treating multicultural skin tones, and the founder of Urban Skin Rx (a brand that specializes in treatments for melanin skin), to add some expert advice while sharing the products that have worked for me. 


Rachel’s Pro Tips For Treating Skin Issues Without Causing Irritation


Apply products from thinnest to thickest: “A good rule of thumb is to typically use the thinnest to thickest products, in that order. If you use a toner or treatment pads, that would be first after cleansing, and then the thinnest serum, followed by any thicker serums. Follow with a moisturizer and an SPF during the daytime.”

Create a regimen“An example of where you may need more products to possibly address your skin concerns is with a brand like The Ordinary, which tends to have only one active ingredient in each product. You could mix or layer serums to make sure your skin is receiving all the necessary ingredients it needs. Typically, at a minimum, you need a cleanser, some type of vitamin C serum, a retinol, eye serum, and of course, a moisturizer with SPF 25 or higher; so usually a minimum of four to five products daily.”

Only use one new product at a time: “Only use one new product at a time for three days before you introduce another one, so if you become irritated, it is easy to identify which product caused it — opposed to if you start five new products on the same day.”

With these basics in mind, here’s what I have found to work for my combination, sensitive skin type. 


Cleansers

I once read somewhere that you shouldn’t invest too much money into cleansers, but the right face wash decides whether I’m going to have irritated skin with more breakouts or balanced skin. I keep three different types of cleansers on my counter:

Cosmedix

Purity Solution

In the mornings, I only cleanse with my oil face wash, because my skin gets irritated if I do anything else.

Avya Skincare

Gentle Cleanser

At night I double-cleanse, alternating between my salicylic and glycolic acid cleansers so I don't overstimulate my skin. Both of these products help keep my breakouts at bay without stripping my skin.


Serums

Next up are my serums, which change a little from morning to night. (Be sure to apply hyaluronic acid to damp skin so that it works best.)


Honor MD

H(ope)2 O Moisturizing Serum

After cleansing in the morning, I spray my skin with rose water and then follow up with a hyaluronic acid. This is the one I'm currently using.

The Ordinary

Hyaluronic Acid 2% + B5

This is a great affordable hyaluronic acid option.


Next, I use these two products. Roff explained that “Niacinimide is a form of vitamin B that reduces inflammation in the skin, helping to heal irritated skin, acne-prone skin, and hyperpigmentation,” while “vitamin C is a powerful antioxidant that reverses oxidative stress that leads to hyperpigmentation from things like sun exposure.” So I guess it makes sense that these two products would make a dynamic duo.

The Ordinary

Niacinamide 10% + Zinc 1%

Next, I follow up with The Ordinary's Niacinamide and Avya Skincare's Vitamin C Serum. This combo has changed my skin completely, getting rid of dark marks I’ve had for months.


To ensure your products don’t peel, wait at least five minutes before layering other products. (I learned this the hard way.) 


Sunscreens

Lastly, I follow up with sunscreen, which we know everyone should be wearing daily


Supergoop

100% Mineral Smooth & Poreless Sunscreen

On days that I wear makeup, I wear Supergoop’s Smooth and Poreless 100% Mineral Matte Screen since it keeps my combo skin looking both matte and glowy all day long. One thing to keep in mind if you do give this product a try is that it does peel if you haven’t allowed everything you’d applied before it to absorb completely

Urban Skin Rx

Complexion Protection SPF 30

On non-makeup days, I use Urban Skin Rx's Complexion Protection Moisturizer with SPF 30. Both of these keep my skin protected without making my face look ashy. 

One thing to keep in mind if you do give this product a try is that it does peel if you haven’t allowed everything you’d applied before it to absorb completely. 


Exfoliators

Chemical exfoliators are one of my favorite ways to keep my skin looking its best, but you have to always proceed with caution, especially depending on your skin’s sensitivity. “It’s important if you have never used a clinical skincare regimen with ingredients like AHAs, BHAs, or retinol that you can start either by only applying every other day or with lower-level percentages,” says Rachel. “After a few weeks or a month, you can upgrade to daily if your skin can tolerate it.” 

The Ordinary

AHA 30% + BHA 2%

Using this at night once a week has improved my dark spots and the texture of my skin.

LAPCOS

Milk Daily Mask

Since The Ordinary's AHA + BHA solution runs the risk of being irritating, I apply a Lapcos Milk Sheet Mask right after I rinse the treatment off.

On the other six nights of the week, I alternate between The Ordinary’s Retinol 0.5% in Squalane and Herbivore’s Prism Glow Serum


Masks + Spot Treatments

Charcoal masks are a must for keeping my breakouts at bay. These are my two favorites:


Aceology

Detoxifying Modeling Mask

If you're into Instagram beauty trends, Aceology Detoxifying Modeling Mask is a fun mask to try. You’ll want to use this mask on a self-care day since it requires a few extra steps, but the nice part is you just peel it off once it’s dry.

Origins

Clear Improvement Charcoal Mask

If trends aren’t your thing and you want a tried, true, and highly-rated mask (that works), Origins Charcoal Honey Mask is a mask you’ll never let yourself run out of, because it somehow gets rid of the gunk without stripping your skin. I don't know what's in their magic potion, but I'm here for it.


Shea Moisture

Charcoal Drying Lotion

Aside from my once-a-week mask, I spot-treat any hormonal breakouts with SheaMoisture Drying Lotion.

Since my breakouts are hormonal, I get pimples and scarring on my neck, décolletage, chest, and shoulders. The best way I’ve found to treat those areas is with glycolic acid pads. My two favorites are these:


The Ordinary

100% Organic Cold-Pressed Rosehip Oil

Last, I apply this rosehip oil, skipping any retinols or acids.


While my regimen seems like a lot, it’s what I’ve found works best for my skin. Knowing the products I have work makes spending more time and money on certain parts of my routine worth it for me. Treating hyperpigmentation isn’t an overnight process, so be patient with yourself. When over-the-counter options don’t work, seek out a professional. Your skin is your biggest, most visible organ, so you want to make sure you’re giving it the care and attention it needs. 


The post My Skincare Routine for Treating Hyperpigmentation appeared first on The Everygirl.

While I believe the basics are what really give you good skin, hair, and makeup, I can’t pretend that I don’t love a little something extra every now and then. For sure, I love a good mask here and there, and I often buy into the latest craze or trend (in the name of science and my career, duh). But I can’t pretend that I don’t indulge in the power of a beauty tool to do some of the heavy lifting. Sure, it’s an investment, but we parade our faces around every single day, whether it’s a trip to the grocery store where you’ll inevitably see that person you were in love with a few years ago but never made a move, your once-a-week video call for work, or just stepping by your mirror a few times a day to catch a glimpse at the one and only face you’ll see IRL for a while (too harsh?). 

If you thought the newest iOS update and virtual-everything were the biggest innovations of 2020, think again. We don’t have to put on a few lotions and potions and just “hope” it does the job anymore; there are effective, researched, and FDA-approved gadgets that do the job without all the guesswork. They’re the smartphones of the beauty world. When I’m looking for a new gadget, I check Nordstrom first. They have everything from $20-30 tools to splurge-worthy devices you’d find at a tech convention. Because they can be a little confusing (you put what where?!), we’re breaking down six different gadgets for every type of person and budget.


1. Wants a pick-me-up that doesn’t break the bank: Ice Roller

An ice roller has become an essential in our editor’s post-hangover, sick-day, need-a-pick-me-up-ASAP kits. This one is made with stainless steel, meaning it’ll stay cold even once you take it out of the fridge. Plus, it’s easy to clean and sanitize and will hold up—especially if you plan to use it basically every Monday-Thursday morning (we can relate!). Pop this in the fridge or freezer, and after cleansing and moisturizing (but before sunscreen), use this to massage in any of those creams or oils. It’ll tackle the puffiness, help your skincare products absorb better, and help you start your day with a little relaxation. Over time, you’ll notice your skin even gets less puffy because you’re used to moving all of that lymphatic fluid around. Don’t sleep on this if you love a good self-care moment.


2. Wants a quick self-care addition to their routine: Nurse Jamie Roller

You’ve likely seen this all over the place, especially if you’re a fan of celebrity beauty videos. But if you’re like us, you probably have little idea of what it actually does. There’s a reason celebs and beauty influencers alike swear by this facial roller: it feels like a red carpet-worthy lymphatic drainage massage right at home. This tool houses 24 massaging stones that when rolled across the face lift, tighten, revive, and enhance your natural features. Nurse Jamie created this product to replicate the experience of one of her in-spa facial massages from the comfort of your beauty vanity. This tops the list as the most routine-friendly option, as it only takes a few minutes to massage all over your entire face and can be done as-needed or over time for the best results.

Not ready to splurge on a Nuface? This is a great less-expensive alternative that tackles many of the same issues, just without the microcurrent.


3. Takes facial massage very seriously: Vibrating T-Bar

My at-home facial massage is great and all, but I’m craving the hands of an esthetician who treats my face like a bowl of kale more than anything in the world. Sound like you? I found the at-home product to save you while you’re staying home (and cost about half as much). This T-bar massager uses vibrations to mimic the feeling of a real massage, so it’s a great addition to your facial massage routine. Grab your favorite facial oil, cream, or serum, and use this in upward strokes across the whole face. Focus between the eyebrows for an extra-relaxing massage, on the neck and chest to de-stress after a long day, and on the jawline to release tension. If you’re craving a little “ooh” and “ahh,” this is the one for you.


4. Wants a salon-quality treatment at home: PMD Microdermabrasion

As we enter the winter months, I’m putting off facials and treatments that I can’t do at home for as long as possible. Why leave my house when I don’t have to? The first treatment I turned to was the PMD Pro for at-home microdermabrasion. Microdermabrasion has been a popular skincare treatment for about a decade, as it helps improve skin tone and texture without all the down time of peels and lasers. It’s good for practically every skin concern—aging, acne, scarring, texture, sun damage, melasma, and more—and is suitable for dry skin types too. PMD created the first at-home microdermabrasion device, offering the same results as an in-office procedure right at home. 

The PMD uses an exfoliating disc with vacuum suction to remove the top layer of dead skin and triggers the immune response in the skin to create new layers and cells. It’s a really easy treatment to incorporate into your usual routine, as it only takes a few minutes once per week. This kit comes with multiple exfoliating discs ranging from ultra-sensitive to intense which allows you to customize the treatment for your skin type and grow with the product as you use it more. Not sure where to start? This tutorial has everything you need to know.


5. Looking for a long-term change without invasive treatments: NuFACE

NUFACE

Trinity Facial Toning Device

This has a rechargeable base that can sit on your vanity and has the option to remove the head and use other attachments, like their Eye and Lip Enhancer that targets smile lines, crows feet, and eyebrow furrows; and their Wrinkle Reducer, which uses red LED light therapy to reduce and prevent fine lines and wrinkles. If anti-aging is your NuFACE goal, get this one.

NuFACE

Mini Facial Toning Device

If toning and contouring is your #1 concern, I recommend this one—it's a little less expensive but still has all the microcurrent you need.

When I first heard of this product, I was pretty skeptical. Electricity? In my face? But once I watched a few videos, this one in particular, I wanted one immediately. NuFACE is described as a non-invasive approach to anti-aging that is both instant and achieved over time. Our face naturally loses current as we age, and this results in sagging skin, loss of firmness, and as we all know it, wrinkles. The NuFACE uses microcurrent that is similar to the current our body naturally produces to help rebuild it, resulting in a natural, easy way to reduce the appearance of wrinkles and fine lines, improve the contours of your skin (more on that in a minute!), and improve skin’s tone and texture. 

I’ll be the first to admit that if there’s one gene my parents have graciously given me, it’s tight skin that looks much younger than it is. What can I say, my mom is 50 and looks 35. But I came to NuFACE to help with lifting and toning my face, and it did the job flawlessly. After using Nuface for five days a week for a few months, the shape of my face basically changed. I have very little definition between my neck and jawline, and it’s been a source of self-esteem issues for as long as I can remember. NuFACE works to lift and tone the bottom half of my face, giving my jawline and cheekbones more definition than I’ve ever had. It’s basically a workout for your face, but the microcurrent goes deeper into the skin’s layers to actually work those muscles underneath. If you deal with puffiness (especially on the lower portions of your face) or trouble with your facial definition, this ends up being a pretty inexpensive alternative to other, much more invasive procedures. And if it helps me push off wrinkles and fine lines a little bit longer, I’ll take it!


6. Wants to turn good-hair-day into every day—and willing to splurge for it: Dyson Airwrap

If you thought Dyson had already outdone themselves with their original Internet-breaking blow dryer, think again, because this baby is one of the finest pieces of equipment I’ve ever laid my eyes on. Dyson created this product with all hair types in mind, so whether you’re looking to go from straight-to-curly, curly-to-straight, frizzy-mess to bombshell-waves, flat-and-lackluster to volumized-goddess, or just bad hair day to good one, this product does it all. The Airwrap uses air styling without extreme heat to transform the hair, so you get your preferred style with less damage. It’s also basically effortless to use because the air styler attracts the hair and wraps it up for you—say goodbye to burns and gloves whenever you want waves and curls!

We are very aware that a hair product shouldn’t cost this much, but you can take a few things into account when thinking about this purchase. I love this product because it cuts down on your hair tools, meaning you can ditch the five curling irons, three straighteners, and two half-working blow-dryers in your bathroom cabinet once and for all. It includes six attachments: two for creating waves and curls, a brush to smooth and control frizz, a brush to create volume, a brush specifically designed to smooth fine hair, and a dryer. So if we do some quick math, you’ll see that between purchasing multiple hair tools (anywhere from $100 to $250 a pop), blow-dry appointments ($50, plus tip), and always having a good hair day (priceless), it stacks up to be a pretty solid investment. And even that aside, if it’s in your budget and makes you happy, we’re all for it. 


This post is sponsored by Nordstrom, but all of the opinions within are those of The Everygirl editorial board.


The post 6 Beauty Gadgets We Love At Every Price Point appeared first on The Everygirl.

Author Name

Contact Form

Name

Email *

Message *