March 2023

I came of age in the my lip gloss be poppin’ era, and because of this, I was never quite able to get on board with the matte lipstick or lipliner trend that took over in my twenties. Since all things early aughts are back in style, I’m in luck. Glossy lips are all the rage again, which is why when I needed to make a much-needed pit-stop while on vacation with my family at Sephora for sunscreen, I couldn’t believe my luck that the new Rare Beauty lip oil launched that very same day.

I added a tube to my in-store pickup order and got back on the road ready to enjoy a shiny and moisturized pout. Here’s my real thoughts on the newest launch from Selena Gomez’s Rare Beauty that I have a feeling will be all over your For You page any minute now.


Rare Beauty

Soft Pinch Tinted Lip Oil

A gel-to-oil lip color that hydrates lips, gives great color payoff, and shines like a gloss without being sticky.

Available in 8 shades


The Formula

Because lip oils are still relatively new to the scene, let’s talk formula in case you haven’t encountered one before. To start, there is of course moisturizing oils in the formula—particularly jojoba seed oil and antioxidant-rich sunflower oil. As an added bonus, it’s vegan and cruelty-free, while also being free of parabens. Score.


The Feel

Lip oil is the perfect solution if you don’t like the sticky feel that comes with gloss but still want a lot of shine.

This lip oil is rather unique in the sense that when you first apply it, it is more of a soft jelly texture, but it does eventually melt into a texture that feels more like a traditional lip oil.


The Look

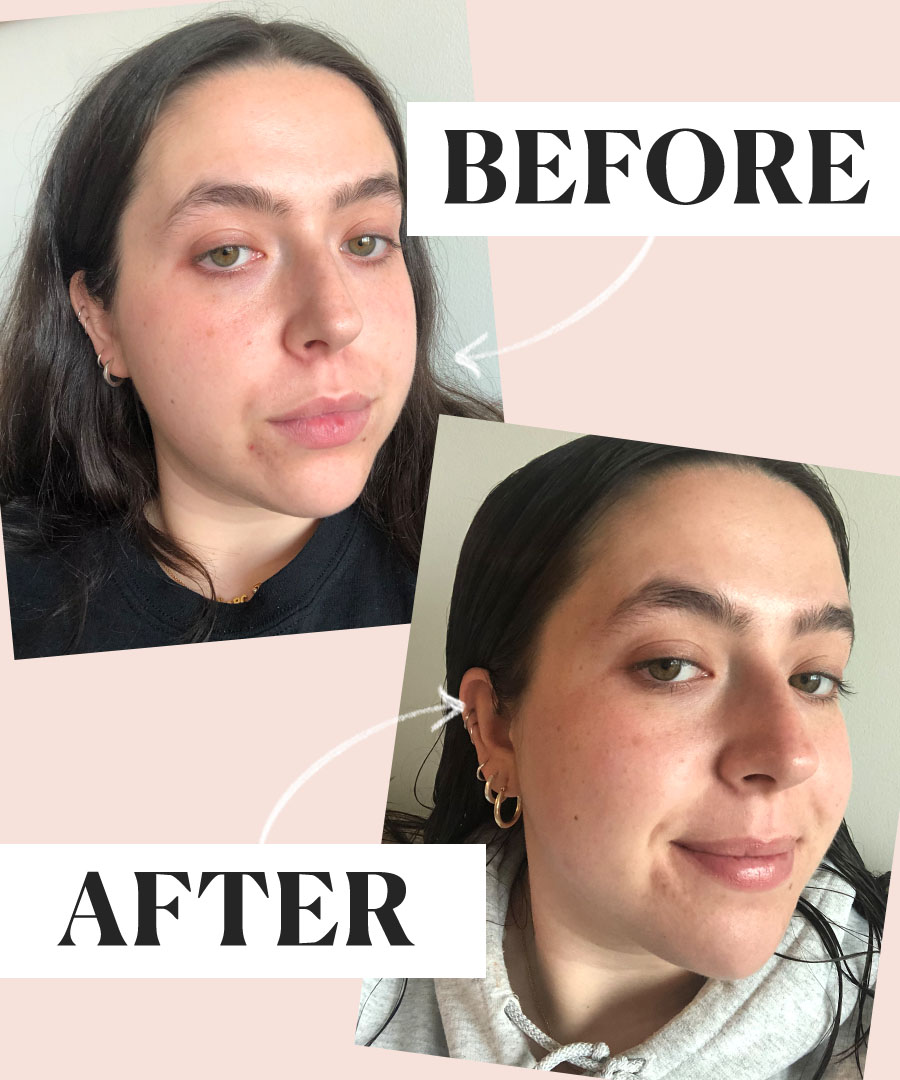
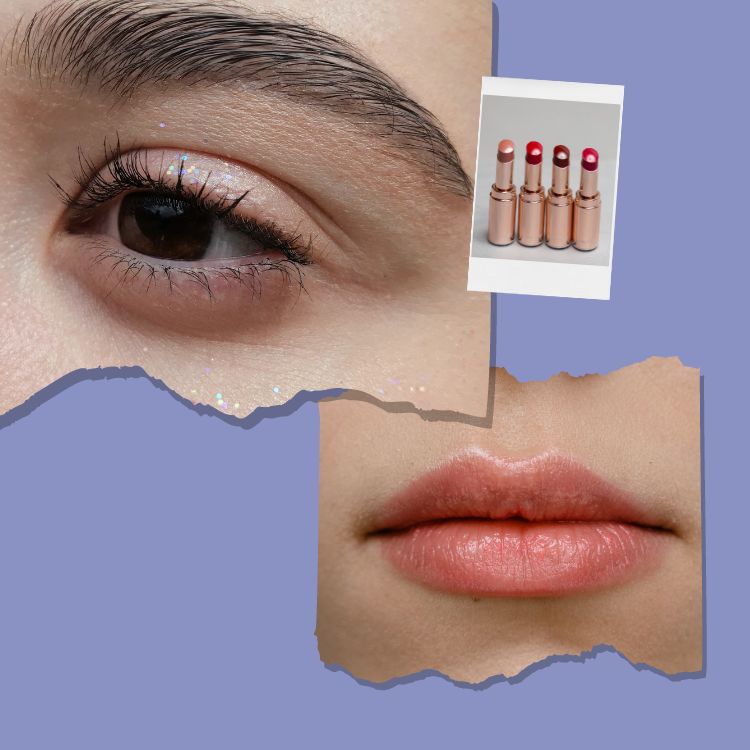
There are currently eight shades to choose from. Because I’m obsessed with all things 90s, I opted to try the shade Delight which is a rose brown shade to match my go-to 90s inspired blowout.

This is much more pigmented than your standard lip oil. Most lip oils come with a light wash of sheer color, but with the Soft Pinch Tinted Lip Oils you can expect more of an opaque look.

You get so much color from this oil that even when the shine factor wears off, there is still a pretty flush of color left behind—similar to a lip stain. If you have ever tried Rare Beauty’s famous Soft Pinch Liquid Blush you know that they take pigment seriously.

Don’t believe me? Take it from Selena herself. She explained on the Rare Beauty website, “One swipe and your lips look so full and smooth! I love how easily you can build up the color without it getting sticky.”


The Wear

The one downside of lip oils is they typically don’t last long, but I was pleasantly surprised to see I got a few hours of wear out of this one thanks to the lasting color and it was super easy to touch up even without a mirror handy, making it the perfect travel lip product. This new lip oil really couldn’t have found a spot in my handbag at a better time.


Rare Beauty

Soft Pinch Tinted Lip Oil

A gel-to-oil lip color that hydrates lips, gives great color payoff, and shines like a gloss without being sticky.

Available in 8 shades


The Verdict

I have to say, thanks to Selena we can end the great lip product debate once and for all. If you want the color and long wear of a lipstick, the shine of a gloss, and the moisturizing element of a lip oil, then you can find everything you are looking for in one convenient tube of the Rare Beauty lip oil. 

If you’re looking for a go-to lippie to wear all spring and summer long, add a tube (or two, or three, or four) to your Sephora cart ASAP because I predict this will be the it-product of the season and will sell out FAST.


Is Rare Beauty Worth the Hype? Our Editors Weigh-In on Their Favorite Products
READ NOW


The post I Tried Rare Beauty’s New Lip Oil and WOW appeared first on The Everygirl.

Isn’t it weird that we want to apply makeup . . . that looks like we’re not wearing makeup? Existential beauty crisis aside, the off-duty model, no makeup vibes are here to stay. This look directly goes against the typical “Instagram” beauty looks we see a lot of —bold brows, full coverage foundation, winged liner, you know what I’m talking about. “No makeup” makeup is basically the bare minimum, focusing more on the steps of application than the number of products.

We’ve broken down the best tips and tricks for this natural trend as well as rounded up our favorite products to get you there quick and easy.


Meet the expert
Erika LaPearl
CELEBRITY MAKEUP ARTIST
Erika is the key makeup artist for rapper Cardi B, focusing on natural and full glam looks.


10 Hacks To Achieving The ‘No Makeup’ Makeup Look


1. Support healthy skin for minimal makeup

This look is all about achieving a natural looking glow. The easiest way to get that? Actually have glowy, natural skin. While not everyone has the amazing youthful glow of Amal Clooney or Jennifer Aniston, we know how to how fake it without a full face of makeup! Before embarking on this no-makeup- makeup journey, indulge in some skin prep. Prep your skin using a hydrating face mask before applying makeup—this can help make sure your skin is supple and moisturized. 

Versed

Dew Point Moisturizing Gel-Cream

A gel moisturizer will add a layer between your skin and foundation without adding extra shine.

Summer Fridays

Jet Lag Mask

To ensure an ultra-moisturized complexion, apply this cult-favorite mask and let it sit for about 10 minutes. The trick is to leave it on—this works flawlessly as a primer for makeup.


2. Prime your base

When you’re going for a minimal look, a primer is the easiest way to get a smooth base. “For me, using a primer creates a base that keeps your makeup in place, so it lasts throughout the day instead of sliding around your face,” said celebrity makeup artist Erika La’Pearl. You can cater your product choices to what kind of look you’re going for or your skin type. A pore-filling primer will smooth and fill any pores without clogging them the way a thick foundation might. An illuminating primer will add that “lit from within” glow and make you look extra hydrated.

Tula

Blurring & Moisturizing Primer

This is the perfect mix of a blurring, soft-focus texture with a bit of radiance. Our editors swear by it.

ColourPop

Hydrating Illuminator

Add a glowy, luminous finish to any foundation by applying this underneath.


3. Go light on the coverage

Steer clear of thick, full coverage foundations for this look. A tinted moisturizer, BB cream, CC cream, or skin tint can give your skin some extra hydration while still allowing some of your freckles, redness, and imperfections to shine through. La’Pearl swears by liquid foundations in this step because they keep your skin looking radiant, blend easily, and can be built up. One of her favorites is Be a 10’s Beyond Belief Foundation if you want a fuller coverage that doesn’t look cakey. Apply your liquid foundation or skin tint with a buffing foundation brush to cover more, or with a sponge to keep the dewiness and sheer it out—La’Pearl’s ideal method of applying foundation.

NARS

Radiant Tinted Moisturizer

The Goldilocks of tinted moisturizers: has a little bit of coverage but not too much, never gets cakey, blends seamlessly, and actually has a wide shade range.

The Lip Bar

3-in-1 Tinted Skin Conditioner

This has customizable coverage that takes you from sheer/light to medium depending on how much you build it up.

Milani

Glow Hydrating Skin Tint

Your skin tint doesn't have to cost a lot, and this Milani proves it. It has a gorgeous radiance that makes your skin look like it's glowing from within.


4. Use a lightweight concealer for blemishes

If you’re still not used to letting your blemishes or dark circles go uncovered, use a light layer of hydrating concealer. Blend with your fingers—the warmth of your skin makes the product melt right in, leaving a natural finish.

NARS

Radiant Creamy Concealer

Arguably the most famous concealer on the planet: our editors swear by this cult-classic for its blendability, shade range, and ability to somehow always look good. La'Pearl also swears by this concealer for her celeb clients, like Cardi B.

NYX

Radiant Under Eye Concealer

This concealer has crept up to the top of our Beauty Editor's favorites list because it's a medium coverage that looks luminous without ever looking oily.


5. Creams are the best for a natural makeup look

Creams make everything just blend and sink right in, and it tends to look more natural than powders. After applying your foundation and concealer, blend a cream bronzer with a damp sponge. Set lightly with a powder bronzer if you’re worried about everything lasting all day or keep all the glowy goodness by locking in with a setting spray. La’Pearl applies bronzer to her cheekbones and the temples, and even blends it on her eyelids as eyeshadow to create dimension and intensify the look a little bit without going overboard. 

Em Cosmetics

Multi Face Play

This contour/bronzer hybrid will add shadows and dimension to your face, but unlike other bronzers, it blends seamlessly into whatever's underneath it. For a natural look, put your brush directly into the product and then blend on your face.

e.l.f. Cosmetics

Putty Bronzer

This inexpensive bronzer rivals some of the most expensive cream bronzers on the market, coming through with a great shade range, a buildable coverage, and easy-to-blend formula.


6. Dew is your friend

Adding a nice dewiness to the tops of the cheekbones can go a long way in making your face look natural but still glowy. Rather than going for a traditional shimmery highlighter, opt for a cream with a clear base. This basically looks just like sweat (sounds gross, but trust us!) or a natural dew to the skin. The texture of the product will also blend right in with all the other cream products on the face.

Merit

Day Glow Highlighting Balm

This highlighter is so good, it sold out for months. Snag this if you like a natural dewy look with a hint of shimmer and gloss.

Danessa Myricks Beauty

Hydrating and Highlighting Balm

If you'd rather not look like you're wearing anything but just want a slight sweaty glow to your face, this is the one.

Flower Beauty

Day Glow Highlighting Glaze

Opt for this drugstore highlighter if you want the best of both worlds: light shimmer with a dewy, glossy finish.


7. Fake the flush

There’s something about a natural, blushed look to the skin that is so gorgeous and unpolished. Get that look the easy way by adding a little bit of cream blush to the apples of the cheeks, up onto the temples, and right on the bridge of the nose.

Makeup By Mario

Soft Pop Blush Stick

If you're a beginner in cream blush, this is the easiest formula on the market, thanks to the built-in applicator that blends the edges seamlessly.

Glossier

Cloud Paint Blush

The blush that started it all: the Cloud Paint from Glossier is the perfect dewy blush that you can wear sheerly or build up for more color (making it ideal for all skin tones).


8. Brush Up Brows

The best part of this look? Bushy, unruly brows are both accepted and encouraged when it comes to natural looking makeup. Enhance the beauty of your natural brows by simply using a brow gel with fibers and brushing them up and into place.

REFY

Brow Sculpt Shape and Hold Gel

This clear gel will hold down even the thickest of brows, holding them in place all day long and creating a laminated effect.

Milani

Weekend Brow Pen

A pen like this will create hairlike strokes in your brows that actually look like little hairs—perfect for someone with naturally sparse brows.

Fenty Beauty

Ultra Fine Brow Pencil & Styler

For those with thick brows naturally, this brow pencil will add some light shading and depth without going overboard. And because it's Fenty, the shade range is strong.


9. No mascara or apply very little

The skin is the star of the show with this look, so it’s okay to go light on the lashes. I know I haven’t worn brown mascara since middle school, but unless you have super dark lashes naturally (so jealous!), it just helps define your eyes without looking too heavy. Curl your lashes and apply a brown mascara to the top and bottom lashes, or really go for the natural look and skip mascara altogether. La’Pearl suggested applying mascara with a smaller brush to help you apply less, like using an old brow mascara wand or repurposing a spoolie from the end of an eyebrow pen.

For this look, we recommend skipping eyeliner, but if you like the look of eyeliner across your lash lines, wiggle your mascara into the root of your lashes for an added definition that’s still subtle.

Covergirl

LashBlast Volume Mascara

A brown waterproof mascara deserves a spot in everyone's "no makeup" collection. It'll open up your eyes without looking like you have anything on.

ILIA

Limitless Lash Lengthening Mascara

This adds lots of length and separation to mimic the look of lash extensions or just naturally long AF lashes.


10. Popsicle Lips

Ah — popsicles. Now I’m hungry! Anyhow, you know the look after you eat a popsicle, where your lips just have a natural tint? Luckily, there are products that give you that same look without the sticky hands. Hack your way to this look by applying any lipstick and blotting off the excess with a tissue.

Persona

E-Balm

This is one of the best lip balms for that glossy, popsicle lip color we all love. Since it's ultra hydrating and leaves a smooth finish, the color looks like your natural lips but better.

Benefit

Benetint Liquid Lip Blush

For a matte look, a lip stain like this will make you look like you were just sucking on a popsicle—literally.


23 New ‘No-Makeup’ Beauty Products To Add to Your Routine ASAP
READ MORE

The post 10 Hacks to Achieving the ‘No Makeup’ Makeup Look appeared first on The Everygirl.

Retinol is only for wrinkles, right? If you’re anything like me, you’ve probably had this thought once or twice. Many retinol-based products are promoted for their ability to reduce the appearance of fine lines and wrinkles. However, retinol also benefits those in their 20s like me.

I first started using a retinol prescription when I was in high school to keep my acne at bay. After a few years of use, I decided to go on Accutane and ditched the retinol. Now two years later, I am losing the initial glow I had from Accutane. I’m noticing a few minor breakouts and a bit of scarring. Re-enter retinol! Here’s everything you need to know about retinol, even if you aren’t looking for anti-aging benefits!


The Facts About Retinol

Retinol is a vitamin A-based ingredient that promotes cell turnover. According to dermatologist Dr. Fatima Fahs, retinol helps to exfoliate away any dead skin cells, which can lead to smoother skin, less acne, a glowing complexion, and, of course, diminished fine lines and wrinkles.

“In your 20s, retinol will help reduce acne—especially the small comedonal acne that
seems to be stubborn and results in textural changes,” Dr. Fahs said. “It will also help brighten your complexion—who doesn’t love a glow? Lastly, if you have scarring, sun spots or dark spots, retinol can lighten them.”

Dr. Fahs also noted retinol boosts collagen production allowing for plumper-looking skin and a reduced appearance of pores.

Tretinoin (a highly concentrated Vitamin A-based medication) is often prescribed by dermatologists for patients with severe acne, sun damage, and wrinkles. The medication can be harsher on the skin than most over-the-counter products and is typically offered in three strengths: .025%, .05%, and .1%. However, retinol-based products have become readily available in lower doses at beauty and drugstores.


Retinol Dos and Don’ts

Start off slow to avoid any irritation or reaction. Dr. Fahs recommended applying a pea-sized amount to the entire face. Start off using the product every other day or every few days. As your tolerance to the ingredient builds, you can increase how often you use the product.

Moisturize! Retinol can be drying, so make sure to amp up your hydration. Dr. Fahs said if you have especially dry skin to try the “sandwich method” in which you moisturize before and after the retinol application.

Do not use retinol as a spot treatment. This can lead to irritation and dryness.

Stay consistent! “Results take a long time—remember, retinols are doing some big work, don’t expect to see much improvement until 6-12 weeks,” Dr. Fahs said. “Stay consistent—the glow-up is real!”


My Recommendations

When I started using retinol again, I was looking for retinol products that wouldn’t break the bank and wouldn’t require a prescription. I’ve got you covered on the most affordable and efficient retinol products that I found during my research:

Versed

Press Restart Gentle Retinol Serum

This is the one I chose to purchase after seeing Skincare by Hyram recommend it on his Youtube channel as a great introductory option. I was able to get my hands on it at my local Target, so if you see it in stock on your next Target run, I recommend grabbing it right away! I decided to go for this serum because it’s very gentle at a .03% retinol, and I was looking for the safest option after being out of the game for so long. The formula is a silky, gel consistency and doesn’t burn upon application (a major plus when it comes to retinol, which can be very irritating in high concentrations). It has a slightly green tint due to the added chlorophyll, an antioxidant that fights again free radicals.

The Inkey List

Retinol Anti-Aging Serum

The Inkey List is one of my favorite brands for affordable, effective skincare. Their retinol serum is only $9.99. Several Sephora reviews mention this product is gentle enough for nightly use. The ingredient list also includes squalane, which promotes overnight hydration, so you won’t experience the common drying effects you normally get with retinol. They also have a retinol-based eye cream that promises to improve the appearance of fine lines, boost collagen, and brighten the area!

The Ordinary

Retinol 0.5% in Squalane

A fan favorite for under $10. Similar to the Inkey List, The Ordinary’s retinol includes squalane, which makes the formula more gentle and safe for nightly use. The Ordinary has a couple different variations of this product with higher concentrations of retinol derivatives, depending on your needs and skin type too. The .05% concentration is a bit gentler than some of the other options, so it’s a great starting point!


Final Results

For starters, don’t be scared of retinol. While yes, it is often prescribed by a dermatologist in high concentrations and may be geared towards wrinkles, it has so many other benefits. Many of the options available at drugstores and beauty stores are more gentle and affordable. After using the Versed retinol for about a week, I noticed my blackheads were decreasing and my skin was definitely glowing! If you are looking for an ingredient that will fight acne, dull skin, and uneven texture, retinol could be the answer. Plus, you’ll be preventing wrinkles in the future! What more could you want?


Dermatologists Agree: Everyone Should Be Using Vitamin C
READ NOW


The post Attention 20-Somethings: You Need To Start Using This Skincare Ingredient ASAP appeared first on The Everygirl.

Welcome to The Everygirl Podcast. Whether you’re looking for insider secrets from successful women that have your dream job, are interested in expert advice to transform your health and feel your best, or just want to be entertained and laugh along with us on your commute, we’ve got you covered.

For far too long, conversations about combating acne have focused purely on the teenage years, hormones, and using birth control as a quick fix. In reality, many people struggle with acne in their adult years, and there are so many more potential reasons for facing skin challenges beyond adolescence. Luckily, there are acne gurus out there like Danielle Gronich, co-founder of CLEARSTEM Skincare and this week’s guest on The Everygirl Podcast. Danielle spent years struggling with adult acne, and now dedicates her life to helping others get to the bottom of their own skin challenges with CLEARSTEM and at the San Diego Acne Clinic.

From your vitamins to your shampoo, there are a whole host of potential culprits for clogged pores and pimples, many of which may surprise you. Read on for three surprising reasons you have acne that you haven’t thought of, and check out this week’s episode of The Everygirl Podcast to hear even more helpful skin tips from Danielle.


1. Genetics

According to Danielle, acne is mostly hereditary, meaning that having acne at any stage in our lives is actually something that could be passed down to us from one or both of our parents. She says that the root cause of acne is something called retention hyper-keratosis, meaning that people who are more prone to acne produce more keratin protein than others. But just because you’re acne-prone genetically does not mean you’re cursed to deal with acne forever. It just means you may have to be more careful of the products you put on your skin, foods you eat, or supplements you take in order to be acne-free. This can also be a helpful reminder that it’s OK if the journey to clearer skin takes longer than you might anticipate.


2. Pore-clogging ingredients in products

It’s happened to all of us at least once in our lives: you pick up a new product that you’re really excited about, you try it out a few times, and suddenly you have a mysterious breakout. However, according to Danielle, acne-causing ingredients in skin and hair products are actually way more common than a one-off incident like this. “There are pore-clogging ingredients in most products,” Danielle said on The Everygirl Podcast. “And by most, I mean most. I mean 95% of products have some sort of pore-clogging filler agent.” Most people are using at least a face wash, as well as shampoo, conditioner, and hair product on a regular basis, meaning that these ingredients could be impacting your skin unexpectedly.

When Danielle treats patients at her clinic in San Diego, the first thing she has them do is bring in every single beauty product that they use on a regular basis, so that she can help them run through the ingredients for potential pore-cloggers. Luckily, you don’t need to fly all the way to San Diego to find out if your moisturizer might be causing your acne; instead, you can DIY this process by copying and pasting the ingredients list of your products into the search function on the CLEARSTEM website.


3. Testosterone-spiking vitamins and supplements

We tend to think of taking vitamins and supplements as a universally healthy thing to do, but did you know that it is possible that your daily vitamin D might be causing you to break out? As Danielle pointed out on The Everygirl Podcast, “There are a lot of really common vitamins that people take, where if it’s in a really high dosage, like higher than 100-200% RDB, they can spike testosterone. And testosterone is the hormone that, when it surges, causes hormonal acne.”

Acne is both internal and external, so taking a good long look at the ingredients and saturation of your vitamins and supplements just might be the solution to your clogged pores. As Danielle mentioned, you may not inherently have a hormonal imbalance that is causing your acne, but your consumption of caffeine, B-12, and zinc supplements can cause your testosterone to spike. Plus, kicking the Celsius habit was probably already on your to-do list anyways.


The post 3 Surprising Reasons You Have Acne That You Haven’t Heard Before appeared first on The Everygirl.

I’m a LMBQ—an acronym I just made up that stands for Low-Maintenance Beauty Queen, though I do think it should be a thing. I want minimal effort and maximum results. I don’t want to spend a few hours each morning transforming into a glowing goddess, though no disrespect to all the Cassie from Euphoria’s out there who love a good self-care beauty ritual. Everyone has their own personal routines, but I just prefer mine to be short!

This is why I’m here to tell you about my favorite minimal-effort beauty treatment: Lash lifts. I have naturally stick-straight, heavy lashes that do not cooperate with an eyelash curler for more than 20 minutes before drooping back to their natural state. Lash lifts are like a perm for your eyelashes. And if you love a lazy girl beauty routine get ready to toss out your eyelash curler and mascara, because this treatment eliminates the need for both.

Lash lifts are the perfect lazy girl beauty treatment for summer, in my humble opinion. You don’t have to worry about mascara melting down your face or having your lashes wilt an hour after curling them with an eyelash curler. I’ve been getting lash lifts for several years and have gone everywhere from high-end salons to places offering Groupon deals—I’m here to tell you everything you need to know.


The Lash Lift Investment

The cost of a lash lift will vary depending on your state and how much your specialist is charging for their skill. I’ve seen lash lifts cost anywhere from $25 to $200. And, yes, I have gotten a $25 Groupon lash lift before and I’ll just say this—I’d rather pay more for skill and comfort! I’ve also had someone over-process my lashes before, and it leaves them looking frazzled and messy.

Lash lifts can last 4-8 weeks. Mine usually last at least 6 weeks. To be honest, I’m not a fan of wearing mascara, so lengthening and darkening my lashes via a lash lift is what I prefer. I also like looking rejuvenated and awake without having to rely on makeup. And unfortunately, my lashes don’t love staying curled with eyelash curlers, so this allows the end result to not only hold but to look natural and shorten my makeup routine. This treatment may not be worth it to you, and that’s okay too!


The Lash Lift Process

Before Treatment

First and foremost, you’re going to want to seek out a licensed esthetician, cosmetologist, or barber. You want to make sure your specialist is deeply informed about this entire process as they’re the ones applying the lifting solution to your eyelashes. I’ll say it again: Always, always, always ensure you’re going to a licensed professional.

Before your treatment, you’ll discuss what you’re looking to achieve, what type of lashes you naturally have, and aftercare. Your specialist should also walk you through the entire process so you know what to expect.

Some things to note before your treatment:

  • Do not wear eye makeup.
  • Do not wear waterproof eyeliner or mascara a week before your treatment.
  • Make sure the eye area is clean.
  • Shower beforehand—I’ll get to this in a sec.
  • Avoid wearing contacts.


During Treatment

Overall, a lash lift can take about an hour. A lash lift and tint can take around an hour and a half. Here’s what goes down during the treatment:

  • Your specialist will place a rod on your eyelid near your lashes, then use a lash glue to curl them against the rod in a gentle “C” shape.
  • They’ll apply the lifting solution to your lashes.
    Once the lifting solution has permeated, they’ll apply a conditioning solution.
  • If you choose to add a tint, they’ll do this last.
  • Finally, they’ll clean your lashes and use a gentle fan to dry them.
  • You’ll see the final result!

The entire process is relaxing. You get to lie down for a short beauty rest while they get to work. They’ll ask you to not open your eyes during the process. This is to avoid getting any solution into your eyes. The end result always leaves me looking more refreshed and awake, which I personally love.


The Results

If your lashes are like mine, your end result will likely go from stick-straight to gorgeous, soft C-curve lashes that don’t droop or fall flat. I love feeling and looking like I seem more awake and rejuvenated afterward, and I often find I don’t need to rely on any eye makeup because they already look refreshed.

There are a few downsides to lash lifts. They don’t last forever, unfortunately, as your lashes will grow, fall out, and experience new growth within an average of a six-week cycle. You also don’t want your specialist to over-process your lashes, because it will leave them damaged, frail, and frazzled. To avoid this, make sure you seek out an expert esthetician in your area. Finally, some clients with skin sensitivities may experience redness, rash, or inflammation. Be sure to address your concerns with your specialist beforehand so they can perform a patch test to monitor irritation.


Post-treatment

There are a few important things you need to note about aftercare, which I’ll list here.

  • You cannot get your lashes wet for 24 hours. This is why I mentioned showering before your treatment!
  • Avoid eye makeup and any type of serums or oils in the eye area for 48 hours after treatment. You won’t want to use mascara anyway, tbh!
  • Condition your lashes with a tiny bit of castor oil 48 hours after treatment. This helps strengthen and condition them post-treatment. I also like using castor oil up until a few days before my treatment because it helps lengthen my lashes too, so I get a really dramatic result post lash lift.
  • Avoid rubbing your eyes and sleeping on your side or stomach to ensure your lashes continue to look nice.
  • Use a tiny lash brush to separate your lashes every morning and evening.


The Lazy-Girl Approved Secret To Never Doing Makeup Again
READ NOW

The post The One Effortless Beauty Treatment Every Lazy Girl Needs This Summer appeared first on The Everygirl.

Author Name

Contact Form

Name

Email *

Message *