August 2021

If you watched Madison Beer’s beauty routine video as much as our beauty editor has, then you’re likely on the same page when we say this: Gone are the days when anything but light, natural cheeks were acceptable because blush is finally having its revival.

Whether you’ve been blushing up your cheeks for years or you’re ready to dip your toes into TikTok’s famous blush trends (there are quite a few at this point), there’s a lot to know about where to place it, what tools to apply it with, what formula to try, what colors work with your skin tone, and more—and we got to the bottom of it, thanks to a few makeup artists.


Meet the expert
Neil Scibelli
CELEBRITY MAKEUP ARTIST
Neil is a makeup artist and beauty expert in New York City.
Meet the expert
Robert Sesnek
CELEBRITY MAKEUP ARTIST
Robert has worked with celebrities like Indya Moore and others.


What is Blush?

Blush was created as a way to make yourself look naturally flushed—like when the kid next to you in kindergarten calls you pretty or when your mom tries to have the sex talk with you as a teenager. When we apply a full face of foundation, concealer, and powder, our skin can look washed out and flat, as our natural skin changes color and has dimension. Blush brings a little extra life to your face. It can be natural and light for an added bit of color or go bold and bright to enhance your look. 


How to Choose the Right Blush Shade

Celebrity makeup artists Robert Sesnek and Neil Scibelli both said the best blush color is the one that works well with your undertone (warm, cool, or neutral). As long as you find a shade within your undertone, you can go as deep, light, natural, and bright as you want to fit your look. Use this as a guide to help you find a shade that makes you feel good: 


Fair Skin

Light, dusty pinks and sheer peaches add a natural flush, while bright pinks of all undertones are perfect for a bold statement.

Benefit Cosmetics

Dandelion Blush


Medium Skin

Bright pink looks great on a cool undertone, while coral and orange bring out warm tones.

e.l.f. Cosmetics

Putty Blush


Olive Skin

Anything with a golden undertone (or a gold shimmer running through it) will bring out the rich, warm tones in your skin. If you’re a cool olive, you can opt for light plums and cool pinks.

Pat McGrath Labs

Divine Powder Blush


Deep/Dark Skin

Coral, brick red, and berry tones tend to have the depth and dimension for your complexion.


Creams vs. Liquids vs. Powder Blushes

There is much more on the scene than your traditional powder blush these days. Not sure where to start? Here’s the difference between each formula, our favorite blushes in each, and why there’s room for all three in your collection: 


Cream

A cream blush usually comes in a stick or pot and is applied with a brush or beauty sponge. It’s much thicker than a liquid blush, but it’s easier to apply with a light hand because you can control how much product you pick up on your brush. Cream blushes blend seamlessly into the skin, whether you have dry or oily skin. If you’re worried about your makeup fading away after a few hours, creams might be the way to go. “Cream blushes tend to bind to the skin a bit better, which also stay in place longer,” Scibelli said.

LYS Beauty

Higher Standard Satin Matte Cream Blush

These pigmented cream blushes were made with deep skin in mind, offering varying ranges of shades that all show up on the lightest to deepest skin tones.

Makeup By Mario

Soft Pop Blush Stick

This is one of the most blendable, foolproof blushes on the market right now, thanks to the built-in brush that blends the product right into whatever you have underneath (whether you're wearing foundation or your moisturizer).

Tower 28 Beauty

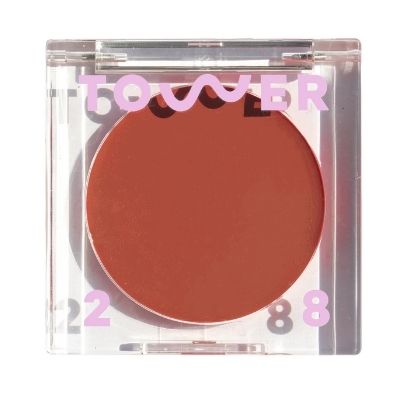
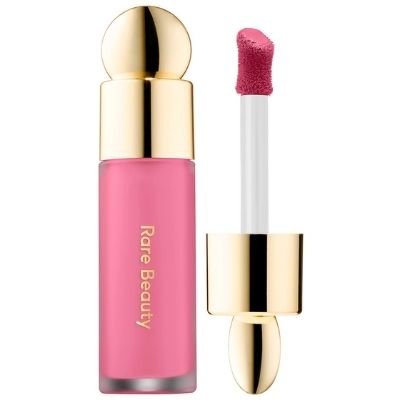
BeachPlease Lip + Cheek Cream Blush

Use this if you want dewy, glassy cheeks that last all day long.


Liquid 

A liquid blush is a bit newer to the market, but it took the world by storm, thanks to Glossier’s famed Cloud Paint. Some liquid blushes have a serum texture that make them sheer, blendable, and soft; however, others are thicker in texture, leading to an opaque formula that can be both dewy and matte. This product is best applied with a stippling brush that can buff the product into your cheeks lightly. 

Danessa Myricks Beauty

Vision Flush Blush

Use this on your eyes, cheeks, and lips for a monochromatic look.
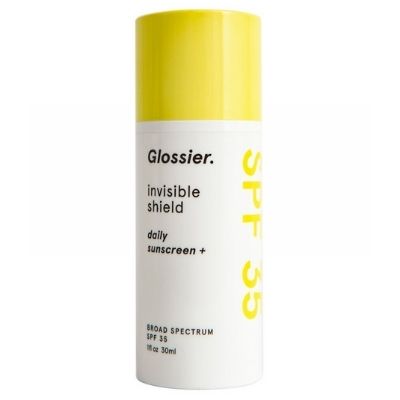
Glossier

Cloud Paint

The blush that started it all: Glossier Cloud Paint is the gold standard of liquid blushes for its easy, blendable formula.

NYX

Sweet Cheeks Soft Cheek Tint Blush

Our editor likes this inexpensive liquid blush even more than Madison Beer's high-end favorite—it's that good.


Powder

You likely already know a bit about powder blush because it was probably the first blush formulation you ever tried. It’s classic, easy to apply, and basically foolproof when using a lightly pigmented product. It comes in matte and shimmer formulas that glide on easily and is usually applied with a brush.

NARS

Blush

It's the most popular blush in the world—and for good reason. Celebrities like Meghan Markle love the natural flush that "Orgasm" adds to your cheeks, while makeup artists swear by the bright shades in NARS's arsenal for editorial looks.
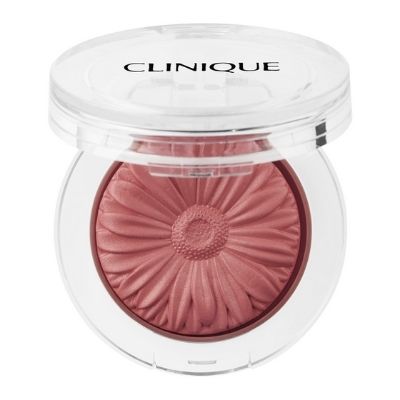
Clinique

Cheek Pop

This is the most beginner-friendly blush on the market because it's sheer, buildable, and comes in tons of gorgeous shades.

Catrice Cosmetics

Blush Box

Sesnek swears by these $6 blushes. "I find myself reaching for these because of the silky texture as well as the color selection."


Matte or Shimmer? 

A matte blush adds a wash of color across your face without adding any glitter or shimmer. They both come in liquid, cream, and powder options, but creams and liquids usually have a dewy, shiny finish that powder matte blushes won’t have. This type is for you if you are afraid of adding extra texture or shine to the face.

Benefit Cosmetics

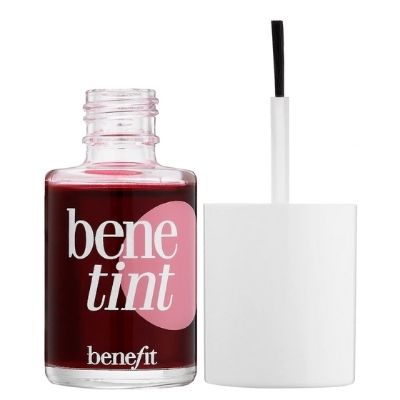
Benetint Rose Lip & Cheek Tint

Benefit's classic serum, liquid blush adds a stain to the cheeks that gives you a natural flush.

Juvia's Place

Blushed Duo

This inexpensive duo gives you two silky matte blush options. You can also mix them together to make your custom color.


On the other hand, a shimmery blush has shimmer and shine running through the formula. It adds an extra bit of glimmer to the cheeks and blends seamlessly with any highlighter or illuminator you might have on. This type is great for beginners because shimmery blushes are usually softer in texture, so they’re easier to blend. However, they can emphasize texture if you’re using a product that’s too gritty or has chunky shimmers. 

L'Oreal

Age Perfect Radiant Satin Blush

If you want a shimmery blush that won't make you look too glowy, this one has a slight sheen that helps it blend beautifully into the skin.
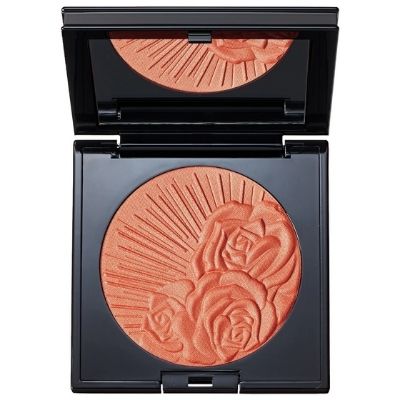
Milani

Baked Blush

This shimmery blush is a must-have in our editor's collection for the major glow it adds to cheeks without clinging to texture.

Melt Cosmetics

Cream Blushlight

Cream blush mixed with highlighter? Sign us up. These have a gorgeous, fine shimmer running through them that'll make you look like you just got back from vacay.


How to Apply Blush

Blush is primarily applied with a brush, but the size and shape vary depending on the look you’re going for. You can also apply cream and liquid blushes with a beauty sponge for a sheer, blended-out look. And for a messy, editorial look, smudging it on your cheeks with your fingertips is the way to go. 

Real Techniques

Instapop Cheek Brush

This is perfect for that natural flush every single time.

e.l.f. Cosmetics

Small Stipple Brush

This is the best brush for applying cream and liquid blushes because it gives you a lot of control and applies a sheer layer.

Fenty Beauty

Face Shaping Brush 125

The angled tip on this brush will help you apply blush to the back of the cheekbones and blend toward the temples.


Where to Apply Blush?


The ever-popular question of where to apply your blush has a different answer depending on who you ask, especially depending on what the trends are.

In 2021, blush is bold, and it isn’t just for your cheeks anymore. Thanks to TikTok, we’ve seen a rise in the “E-girl” blush, where you apply a little blush to the tip of your nose (making your nose appear button-like), the wave blush, where you apply it in a wave across your nose and under your eyes (to appear sun-kissed), and Madison Beer’s blush, where she basically adds blush to her whole face.


But is that the right placement for you? If you’re going for a natural look, Scibelli recommended following the “natural structure of your cheekbones.” He suggested smiling and applying your blush just above the apples of your cheeks and then blending out toward your temples. This will lift the cheekbones and add a little extra color to your face without going overboard. But you can also use blush to enhance your natural face shape, add balance, and achieve a specific look. Follow these guidelines depending on the look you’re hoping to achieve: 

  • For a natural look: apply blush to the apples of the cheek and blend toward the temples/ears
  • To lift your face and make it appear more oval-shaped: apply blush to the back of the cheekbones into your temples
  • For a sunkissed glow: apply blush underneath your eyes, across the bridge of the nose, and back toward the ear 
  • For an editorial look: apply your blush to the back of the cheekbones, blending into your eyeshadow for a draped effect
  • To shorten your face and create balance: apply blush to the center of the apples and out, just toward your eyes, avoiding blending too far out toward the temples. 

Regardless of your face shape, celebrity makeup artist Robert Sesnek said blending is key. “Blending and diffusing the color in a buffing motion will soften all lines and edges.” 


How to Get Blush to Last All Day Long

You can use a makeup primer underneath your complexion products to help makeup stay in place all day (we love one with a tacky finish, like Milk Makeup Hydro Grip). For all-day wear, Scibelli recommended using a cream blush and setting it with a powder blush in a similar shade or your translucent setting powder. Your blush seriously won’t budge.

Laura Mercier

Translucent Setting Powder

This is the end all, be all setting powder every makeup artist keeps in their kit—it also works well to set your cream blushes in place when you use a fluffy brush.


How to Avoid “Clown” Blush

We all know the dreaded moment when you realize you went a little too heavy-handed and you look like you just stepped away from your circus audition. To avoid this altogether, Sesnek recommended adding your blush sparingly and with a light hand. “It’s always easier to add then subtract when it comes to blush.” But fear not: If you’ve overdone it, there is a way to come back. Sesnek suggested buffing a translucent powder on top of your blush to sheer the intensity and soften the look. You can also take your foundation brush or sponge with no new product and blend out the edges to help it blend seamlessly into your skin. 


I Have Rosacea—Can I Still Wear Blush? 

Just because you have rosacea, acne, or just a natural flush to your skin doesn’t mean you have to forgo blush altogether. Instead of adding more pinky, red tones to your skin, opt for a neutral-toned brown shade. The neutral tones work with every undertone, and the brown color counteracts any natural redness you have in your skin. But who says redness has to be covered anyway? You can always rock your favorite color blush regardless—there are no rules. 

Merit

Flush Balm Cream Blush

This has a creamy, slightly yellow tone that works with most skin tones.

Laura Mercier

Blush Color Infusion

If you want to add a sheer, light shimmer to your cheeks, this is the neutral brown blush to go for.


New to Eye Makeup? Here’s the Ultimate Guide to Everything Eyeshadow and More
READ MORE


The post Blush Guide: Everything You Ever Needed to Know About Applying the Perfect Blush appeared first on The Everygirl.

As you begin to focus on youth preservation as it relates to skincare, a topical treatment more effective than retinol at maintaining elasticity and warding off fine lines doesn’t exist. While retinol is an absolute necessity for retaining your youthful glow, navigating the different formulations and deciding which is best for your routine can be tricky.

We’re breaking down the different terminology of retinol and giving you some important tips you should know before you begin using it. Relax, your best skin is on the way!


Meet the expert
Dr. Tsippora Shainhouse
BOARD-CERTIFIED DERMATOLOGIST
Dr. Shainhouse is a dermatologist in Beverly Hills focusing on skin conditions, non-surgical procedures, and skincare.
Meet the expert
Dr. Caroline A. Chang, MD, FAAD
BOARD-CERTIFIED DERMATOLOGIST
Dr. Chang is a dermatologist in Rhode Island with an emphasis on both cosmetic and medical dermatology.

 
What is retinol?

Retinol, to put it simply, is a form of vitamin A. “Retinoids encourage skin cell maturation and boost cell turnover, removing superficial dead skin and flattening the top layers of cells, leaving skin looking smoother, luminous, and more even-toned,” said Dr. Tsippora Shainhouse, MD, FAAD, board-certified dermatologist in Beverly Hills, California.

Retinol is the gold standard for youth preservation (anti-aging) in skincare because it is the only scientifically proven ingredient that effectively stimulates the production of collagen while also being extremely effective against acne. “[Retinols] help loosen the dead skin cells that clog up pores and lead to acne lesions, especially when combined with oil and bacteria,” Dr. Shainhouse said. “They can help treat and prevent both comedones (blackheads and whiteheads) and inflammatory acne lesions.”

She explained that retinol is also often combined with other ingredients to help tone, soften, and soothe acne-prone skin. So whatever your skin issues are, slowly adding a retinol product to your routine can’t hurt.


Source: Social Squares


There are various types of retinol, and navigating the verbiage is what makes this must-have product sometimes very intimidating to understand. Retinol, retinoids, and Retin-A—what’s the difference? The difference comes down to retinoic acid.

Retinol and retinoids are essentially the same thing; when applied topically, they react with the enzymes in your skin to produce retinoic acid. Your skin uses this retinoic acid to improve discoloration, reverse the visibility of fine lines, stimulate collagen production, and strengthen deeper levels of your skin to prevent it from showing signs of aging. This process is a lengthy one—the creation and retention of higher levels of retinoic acid can take three to six months to see full results.

Retin-A is one of many brand names for prescription-strength tretinoin. Tretinoin, another derivative of vitamin A, is itself a retinoic acid and does not require any metabolic function in order to create retinol in your skin. This is why tretinoin can only be obtained with a prescription, as it has been said to be roughly 100 times stronger than over-the-counter retinol products.


Source: Homey Oh My


Retinoids v. Retin-A—Which one do I need?

Deciding which retinol product to use can be really difficult. A dermatologist will tell you that prescription strength is the only real way to see results, and an esthetician will balk at the idea of such a heavy-handed approach. So, what should you do? Dr. Shainhouse said that pretty much anyone can use and benefit from a retinoid product in their skincare routine, but they “must find the formulation best suited for [their] skin type and skin condition.”

If you’ve never used a vitamin A product before, testing the waters with a retinoid is probably the best way to start. However, keep in mind that in order to see any results from the use of a retinoid, you will have to use it every night (or every other night if your skin is especially sensitive) for up to six months. This is important when considering the price point of the products you choose, as you will likely go through a few bottles in that time.

The Ordinary

Retinol 0.2% in Squalane

$5.30

An extra budget-friendly option with tons of positive reviews.

Versed

Press Restart Gentle Retinol Serum

$21.99

Perfect for beginners who want a gentle product that is still effective.

Ren Clean Skincare

Bio Retinoid Anti-Wrinkle Concentrate Oil

$69

Moisturizing and gentle for sensitive skin.

Shani Darden

Retinol Reform

$88

From celebrity esthetician Shani Darden's expert line of products comes this serum containing a mix of retinol and lactic acid to renew, resurface, and replenish skin.

If you’ve noticed a few fine lines or your skin is a little duller than it once was, then a retinoid will work just fine. Board-certified cosmetic and medical dermatologist Caroline A. Chang, MD, FAAD recommended talking to a doctor about tretinoin if you’re looking to treat acne or if you have very oily skin. In short, retinoids are great products—tretinoin is just stronger. Tretinoin should be used every three nights when you first begin, working up to every two, and then eventually every other night. Use your best judgment and keep in communication with your doctor. While we typically think of retinol as only a youth-preserving product, tretinoin is one of the strongest and most effective medicines for acneic skin.

“For cosmetic use, anyone over 30 should start using a retinol to maintain healthy skin,” Dr. Chang said. She suggested starting with over-the-counter retinol if you have dry or sensitive skin. After using the bottle without experiencing irritation, choose a higher-strength formula or talk to a doctor about prescription-strength retinol or tretinoin.” Stronger isn’t necessarily better [because] retinols all work for anti-aging, but stronger ones are usually more drying, [which is] good for those with oily skin,” Dr. Chang said.

Dr. Shainhouse noted that retinol use is not approved while you’re pregnant or breastfeeding. 


Source: Rawpixel


What to expect when using retinol

Vitamin A is incredible for your skin, but unfortunately, you’re going to have to convince your skin that this is true at first. Retinoids and tretinoin are notoriously irritating at the beginning phases of use, which is why a lot of women ditch them before seeing any results. But why does that happen? “Skin cells are programmed to develop and make their way to the skin surface over two weeks, and then shed over two weeks,” Dr. Shainhouse said. “This process can slow down as skin ages and cells are often retained in the top layers, leaving skin dull, flaky, clogged. The application of topical retinoids ensures that skin cells mature and shed as they are supposed to.” This is why your skin sheds or peels.

Go into your new relationship with retinol by accepting the initial “ugly phase” that will come with it. Your skin might purge (bring underlying blemishes to the surface quicker), peel, and be in some state of inflammation for a little while. Stick it out. It will be worth it.

More is not more when it comes to retinol—you must use these products as they are directed to be used. You cannot use retinol as a spot treatment, and you will regret doubling up on the product with the hopes that it will work faster. It won’t.

If you have a darker skin tone, Dr. Shainhouse explained that the irritation from using retinol can result in temporary dark patches on your skin (also known as post-inflammatory pigmentation, or PIH). “Start [retinol products] low and slow in darker skin types.”


Source: @glow.with.mae


How to use retinol

Again, only use your retinol products as directed by either the packaging or your doctor.  After you’ve double cleansed and patted in a gentle toner, allow your skin to fully dry for up to 30 minutes. Apply a pea-sized amount of your product in upward strokes, focusing on the forehead, around your mouth, under your eyes, and along your jawline.

Both Dr. Shainhouse and Dr. Chang explained that the best way to prevent peeling and irritation is to start slow. “You can also start using retinol a few times a week and gradually increase applications until your skin can tolerate nightly application,” Dr. Chang said.

Because retinol encourages new skin cell production, it also speeds up the dying of old skin cells. Incorporating acidic exfoliation once or twice a week will help minimize the peeling that retinol is known to cause when you first begin using it. Use these treatments on nights when you aren’t applying retinol or in the morning when you can allow a full 12 hours before your retinol goes on.

Maelove

The Night Renewer Glycolic Acid Cream

$27.95

A glycolic acid serum suspended in a cream that's perfect for dry, sensitive skin.

Farmacy

Honeymoon Glow AHA Resurfacing Night Serum

$58

This gentle-yet-effective AHA exfoliating night serum uses 14 percent AHA, along with hyaluronic acid and honey to moisturize and soothe irritated skin.

Sunday Riley

Good Genes All-In-One Lactic Acid Treatment

$122

This lactic acid treatment exfoliates, smoothes textures, and replenishes the skin—all in one product.

A calming and gentle moisturizer should go on after you’ve allowed your retinol product to fully absorb. Try to wait at least 20 minutes before applying any product on top to ensure that your skin is receiving a full concentration of the retinol.

Weleda

Skin Food Moisturizing Cream

$18.99

For extra dry skin that needs an occlusive barrier at night to lock in moisture, look no further than Skin Food.

Neutrogena

Hydro Boost Hydrating Water Gel Face Moisturizer

$18.69

A hydrating gel moisturizer with hyaluronic acid, perfect for combination/oily skin types.

First Aid Beauty

Ultra Repair Cream Intense Hydration

$36

This thick cream moisturizer can be used on the face or body for a non-greasy but highly moisturizing night cream.

However, retinol can make your skin sensitive to the sun because of its exfoliating properties. “Newer, fresher skin cells may be more prone to sunburn and new UV damage,” Dr. Shainhouse said. She suggested always using a broad-spectrum sunscreen, but it’s especially important to apply every morning while using any retinol products. 

Glossier

Invisible Shield SPF 35 Sunscreen

$25

"Sunscreen for people who dont like sunscreen" is right—the lightweight water-gel formula of this sunscreen is basically undetectable on the skin.

EltaMD

UV Daily Facial Sunscreen Broad-Spectrum SPF 40

$30.50

Acne-prone, sensitive, dry, and oily skin types will benefit from this non-drying, non-irritating, dermatologist-favorite sunscreen.

Supergoop!

Unseen Sunscreen SPF 40

$34

Half sunscreen, half makeup primer, this sunscreen dries down to a natural finish to diminish pores and grip makeup, all while protecting from UVA/UVB rays.


Why You Should Use Hyaluronic Acid and Retinol Together
READ MORE


The post Retinols, Retinoids, and Retin-A: Here’s What You Need to Know appeared first on The Everygirl.

Author Name

Contact Form

Name

Email *

Message *