March 2022

In a world full of $600 hair tools (hi, Dyson Airwrap), $1,200 exercise bikes, and $8,000 handbags, how do we know what’s a money grab and what’s worth it? Our editors are all about saving their money (hello, travel!) where they can, so big purchases have to put in a lot of work to feel worth it. And after much deliberation, we’re sure of one thing: The Dyson Supersonic Hair Dryer is worth it.

After testing for over a year, we’re sharing everything you need to know about the dryer and its iconic design, how to use it, and two of our editors’ (with two very different hair types) experiences.


About the Dyson Supersonic Hair Dryer

Consider this the hair dryer of the future. The Dyson Supersonic claims to increase smoothness and shine while decreasing frizz and nix your drying time and all the breakage you might associate with blow drying. The Dyson V9 motor uses their patented Air Multiplier technology, which produces lots of air at a controlled rate to dry your hair faster. On the damage front, the Dyson dryer actually measures the heat coming out of the dryer 40 times a second to regulate and control how hot the tool gets to prevent the damage we’ve come to expect with hot tools. Less damage makes the hair shinier and smoother—when you use the tool and over time. And if you’re worried about frizz, don’t be: The dryer uses negative ions to reduce static in the air and keep your hair smooth all day long. 

The Dyson Supersonic has three speeds (low, medium, high) and four temperature settings, including a cold shot. It also comes with three attachments: a diffuser and two nozzles (one for smoothing and one for concentrating air flow, great for blowouts and styling bangs). Dyson also launched three additional attachments since the Supersonic was released, including the Flyaway Attachment (for smoothing down flyaways), the Wide Tooth Comb Attachment (for stretching curly and coily hair), and the Gentle Air Attachment (for diffusing and controlling the heat to protect fine hair types). 

Dyson

Supersonic Hair Dryer Gift Set

Run, don't walk: This limited edition set won't last long, containing three (!) extra attachments for the same price. Hurry!

Dyson

Supersonic Flyaway Attachment

For smoothing flyaways and adding shine

Dyson

Supersonic Gentle Air Attachment

To protect fine and damaged hair types from excess heat

Dyson

Supersonic Wide Tooth Comb Attachment

For stretching and shaping curly and coily textures

The design is very sleek. For something with so much innovative tech, you’d expect a clunky, heavy tool that hurts to hold up for more than a few minutes—but not the Dyson Supersonic. Compared to other hair dryers, this is actually much lighter to hold, and the design is easy to maneuver around your head. The motor at the center of the device is smaller and brushless, unlike typical hair dryers, which makes it much quieter and lighter to hold. If you’re used to considering your daily blow dry an arm workout, you might have to rethink your workout routine with this. Dyson designed the dryer as an homage to their bestselling fans, hence the hole at the center that makes its design so iconic.

While you’re holding the tool, you don’t have to worry that your hand will get hot holding it or touching the attachments, which are magnetic and easy to slip on and off when you’re styling. 
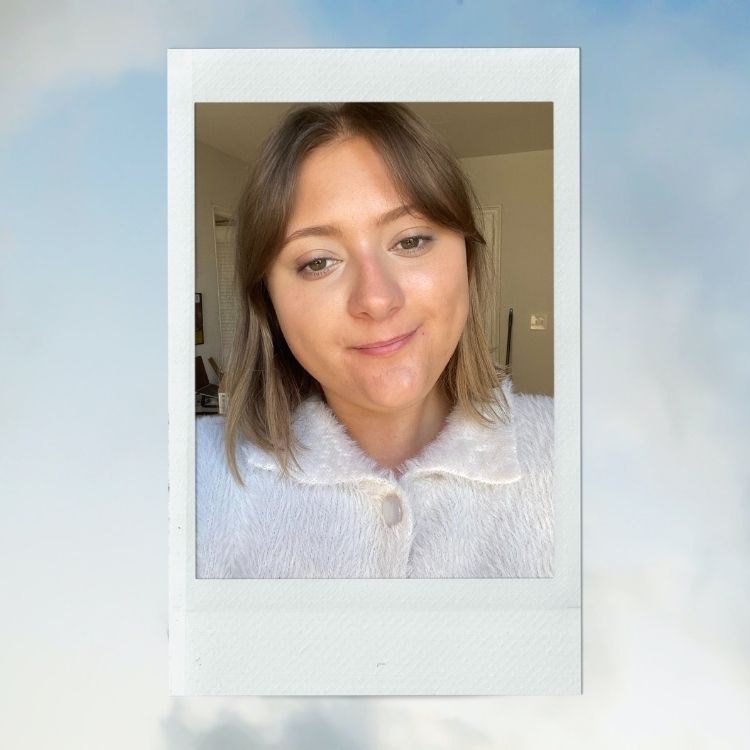


Beth: About My Hair

My fine, thin, straight hair pretty much always looks lifeless. Without any oomph, my hair sticks flat against my head, making it look even thinner than it actually is. I haven’t bleached my hair in a year (woo!), so my hair is pretty much entirely my natural color (plus a little dimension at the ends from past highlighting). But I’m not without troubles, as without any color, my hair is extremely oily. I can go just one day in between washes, and that second-day hair looks bad. So I’m washing my hair a lot more than I ever have, and I’m doing everything I can to keep the ends moisturized and healthy.

I have a medium-length bob haircut that just brushes my shoulders and curtain bangs that are in desperate need of a trim. I’ve had curtain bangs for two years now, and I can’t imagine myself ever having a different haircut. But obviously, curtain bangs require quite a bit of styling, so I have to make sure to blow dry them in place every single day.


Beth: Experience

Yes, I am a beauty editor, but I sat on trying this dryer for a long time. Based on everything you read above about my hair, I just never felt like this dryer would be worth it. My hair dries quickly (both with nothing and with a hair dryer), and I don’t have much of it. My dryer that’s a solid $200 cheaper than the Dyson will suffice—or so I thought.

The first thing I noticed about the Dyson was that it comes with everything. My other hair dryer came with just the hair dryer, so if I wanted any accessories (diffuser, concentrator, brushes, etc.), I had to order them separately, which added up.

It’s important that I style my curtain bangs every day or they’d just fall flat and straight. I use one of the concentrator nozzles (it doesn’t matter which; I’ve had the same experience using both) and the round brush that comes with the dryer to blow them out and give them lots of volume and shape. I suck with round brushes and otherwise have used the Revlon One-Step Volumizer to do my bangs since I got them because I can’t figure out how to hold a brush and a dryer at the same time, but somehow, the Dyson makes it really easy. I caught on quickly and have used this method to do my bangs for months without fail.


Beth: Results

And next thing I knew, I had become a simp for all things Dyson. While other hair dryers can definitely dry my hair quickly, the Dyson is in a league of its own. The first time I used it, I timed my drying time on my phone. The result? 1:40:11. Less than two minutes to dry my whole head. Yes, my hair is short and fine, but it takes more time to make a cup of instant coffee. That alone immediately made the Dyson worth the cash to me. I am often running late, but I never worry if I have enough time to blow dry now. I always have two minutes.

Whenever I use blow dryers, my hair feels fried. No matter what I do, my ends get crunchy and my hair looks frizzy. With this dryer, I almost forgot to even say this because it has completed transformed how my hair feels after blow drying. I used to dread blow drying my hair, and if I wanted my hair to look good, I’d bake in extra time to air dry. Now? I look forward to blow drying my hair because I know it’ll always look and feel healthy and smooth.

But far and wide, what made this hair dryer worth it for me is how much volume it added to my hair. Like I’ve said, I have fine, thin, straight hair—what on Earth do I need a splurgey hair dryer for? I’ve discovered that on my hair type, the Dyson Supersonic is a dream for creating lots of big volume (and I mean big). I use the round brush that comes with the dryer (which is perfect for curtain bangs, I must add) and one of the concentrator nozzles to style my bangs and add a little volume to my roots. Otherwise, I rough dry without any attachments, and my hair always looks like I just stepped off a movie set.


Beth: Is It Worth It?

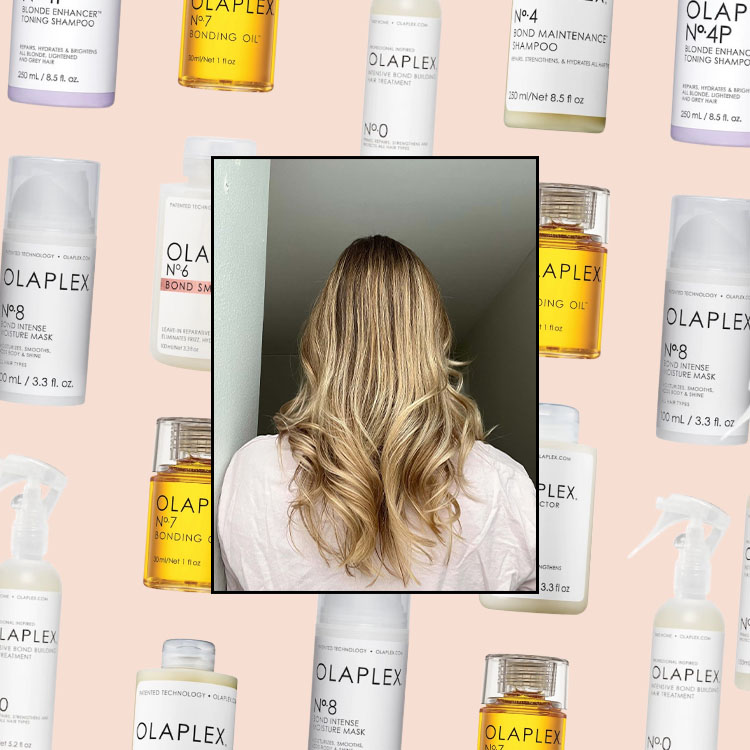
A resounding yes, yes, yes. I never imagined a $400 hunk of plastic would have such a hold on me, but I don’t care. Since I got my Dyson hair dryer, I offloaded my old dryers to my mom and friends because I refuse to use anything else. My hair has never been better, and while good health, no bleach, and lots of Olaplex are what I have to thank for my hair’s health, the Dyson is what’s making it look good.


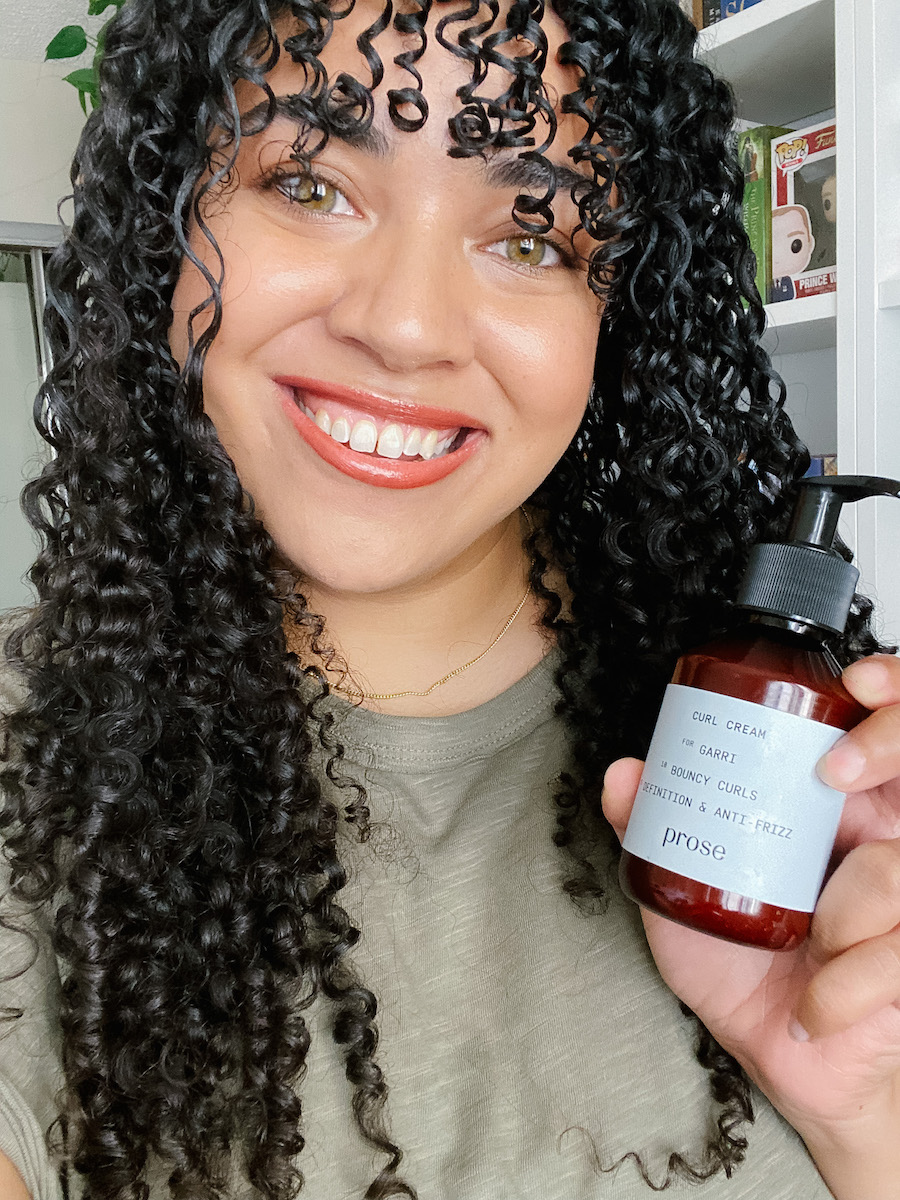
Garri: About My Hair

Let me take you back about 10 years. I was 18, just starting college, and deciding who I wanted to be for the rest of my life (I can’t be alone in thinking that college was going to be the start of a whole new me). Part of that decision-making process was finally figuring out what exactly I was going to do with my hair.

My hair is very curly—a mixture of 3b and 3c curls—and I spent most of my puberty years straightening it by any means necessary. At 18, I decided enough was enough and set out to finally learn a thing or two about caring for my curls. Fast forward to now, and I’ve got my hair care down to a science. I know exactly what products to use, how to style it, how to sleep with it (I could write an entire book about sleeping with curly hair), and how to keep it healthy. The result? I have extremely long (don’t let that shrinkage fool you), healthy curls. There’s only one aspect of my hair that I could do without: the insanely long drying process. That’s where the Dyson hair dryer comes in.


Garri: Experience

I spent years using whatever cheap blow dryer and diffuser attachment Ulta had available, and they were always just fine. They weren’t amazing, but they did dry my hair (even if it took over an hour) just fine. When the Dyson hair dryer came out, I knew I had to get it—I just couldn’t stomach the price. So instead of just biting the bullet and buying the hair dryer every YouTuber and their mother seemed to use, I struggled with my cheap option and, more often than not, just opted for air drying to save my arms from the pain that came with holding a diffuser to my head for hours each week.

When I finally purchased the Dyson, I was immediately blown away (LOL). It’s sleek, lightweight compared to the behemoths I used to use, and so easy to navigate. Of all the hair dryers I’ve used, the Dyson is truly unmatched. The heat controls are the most precise I’ve ever seen and the technology ensures that even on a higher heat setting, I’m not doing too much damage to my hair. With the Dyson, I actually look forward to this part of my routine rather than dread and avoid it altogether.


Garri: Results

The only regret I have with the Dyson is that I didn’t buy it sooner. Yes, it’s an investment, but it’s made my hair routine so much easier. What used to be an hour or more of drying with other dryers is only about 30 minutes with the Dyson. The time-saving aspect alone makes it so worth it. But a major part of my journey to healthy hair has also been avoiding heat damage as much as possible. With the Dyson, I know I’m protecting my hair from damage while still getting it dry in a flash. There’s no longer the need to sacrifice my hair health for the sake of not walking around with wet hair all day, and I love that for me.


Shop Our Other Dyson Faves: 

Dyson

Corrale Straightener

This flips the damaging, hair-frying idea of flat irons on its head, as this cordless flat iron leaves hair smoother and softer with less damage than other irons. (And a note from our editor: it makes the best waves—hand's down.)

Dyson

Airwrap Styler

The most infamous of Dyson tools, this $600 tool creates curls and waves, dries, volumizes, and straightens and smoothes all in one. If you find it in stock, don't hesitate.

Dyson

Airwrap Small Volumizing Brush Attachment

Nope, the Airwrap isn't just for long hair. This short volumizing brush is perfect for creating volume and waves on short hair, as well as styling bangs.

Dyson

Airwrap Firm Smoothing Brush Attachment

This Airwrap attachment was designed to smooth out the frizziest and coiliest of curls with ease.

Dyson

Airwrap Small Smoothing Brush Attachment

This smoothes and shapes fine and/or short hair, as well as bangs.


Is Olaplex Worth It? I Tried It On My Damaged Hair for 2 Months
read more

The post Is the $400 Dyson Hair Dryer Worth It? 2 Editors With Different Hair Types Tried It appeared first on The Everygirl.

When it comes to manifesting the hair of your dreams, having a one-size-fits-all solution isn’t always the move. Depending on your hair concerns, your hair goals, and (yes) even the climate you live in, there are plenty of factors that should be taken into account when developing your be-all-end-all hair care system. And while we’re ready to take our hair efforts to the next level, we simply don’t have the time or energy to curate it ourselves. So when we had the opportunity to give Prose a go with the intention to have more good hair days, we jumped in head hair first.

A free consultation, a customized hair care routine delivered straight to your door, cute packaging, and sustainable and clean ingredients—it sounds too good to be true. But is it? Four of our editors with different hair types gave Prose a try, from their free hair consultation to unboxing to giving it a go and beyond. After weeks of use, they’re spilling the tea on all there is to know about Prose—no aimless wandering in the hair care aisle required:


Initial thoughts:

I was admittedly quite skeptical when my customized routine from Prose gave me my products and suggested I *not* use conditioner. While, yes, I do have very oily hair (I barely last a day in between washes), I have never just not used conditioner. Is that even a thing? Will my hair just fall off? I was unsure. I used the Pre-Shampoo Scalp Mask and the shampoo, and then I got out of the shower to dry my hair a little and then apply the leave-in spray.

Upon first impression, I really loved how clean my hair felt after using the scalp mask and shampoo. I use a lot of different scalp masks, but this one gave me both a good scrub while lathering up. The shampoo left my hair extremely clean, but it wasn’t stripped or dry. I was very concerned that my hair would feel like straw without conditioner, but I was pleasantly surprised that after using the leave-in, my hair felt just as soft as ever. The volume was extremely noticeable, and someone even commented that my hair had a lot of body when I went to dinner that night—and that’s when you know.

I opted for no scent in all of my products, which I really appreciated as an option. I am very dedicated to my perfume collection and want that scent to shine through whenever possible (y’all, perfume is expensive), but I can rarely find products without a scent.


After a few weeks of use:

The most notable part of my Prose experience is how long my hair is lasting in between washes. With my other shampoos and conditioners, I’m rocking a messy bun on day-two hair. Day three isn’t even a possibility. The first time I used my Prose products, I went a full five (!!!) days without washing. Yes, that fifth day was not necessarily pretty, but I didn’t have to messy-bun it until the fourth day. Mind-blowing.

I’ve tested it now a few times with a conditioner, and I surprisingly like using it without. Am I… anti-conditioner now? Perhaps. My hair feels soft and smooth, but it doesn’t get weighed down at all like it normally would.

My scalp is also quite sensitive and prone to getting flaky and itchy, but the Pre-Shampoo Scalp Mask was so soothing. I love the slight tingle it gives, but it definitely doesn’t burn.


The verdict:

Any product that gives me the chance to avoid washing my hair is a winner in my book. I’ll admit, I was a bit unsure about the “no conditioner” thing, but I think it might be my hair’s saving grace. I’m a beauty editor, so I rarely stay loyal to one product for a long time, but I definitely never want to be without this scalp mask and shampoo combo. I’m already picturing using it on a Friday before a weekend at the lake house so I don’t have to worry about washing my hair at the cottage—a match made in heaven.


Initial thoughts:

I am, first and foremost, a creature of habit. I like what I like and I don’t deviate from my established routines, and that’s just how it is. So while I’m not reluctant to try new hair products, I am always skeptical they’ll be as good as my tried-and-trues. I’m happy to report that with Prose, I was wrong. I love that my products are tailored to my specific needs and goals (Prose even considers your specific environmental factors when crafting your products—something I didn’t even realize I needed). 

My Prose system consists of the Pre-Shampoo Scalp Mask, shampoo, conditioner, curl cream, and hair oil. When washing my hair, I noticed the benefits of the scalp mask almost immediately. It truly feels so soothing on my perpetually itchy and irritated scalp. While the shampoo lathers a ton, it didn’t leave my hair feeling stripped and stringy, but it did feel super clean and build-up free, which is crucial when you use a ton of styling products like I do. I typically always use a deep conditioner as a final treatment after my regular conditioner, but the Prose conditioner was so good all on its own. It left my hair feeling incredibly soft, shiny, and primed for styling. 

In the 10 years I’ve been wearing my hair naturally curly, I have always, always styled with a strong hold gel. When Prose suggested I use just their curl cream, I was extremely doubtful it would get the job done. However, after styling with the curl cream the way I would normally use a gel (sectioning my curls and then individually twirling each one with product—yeah, it takes a while), I was truly shocked by the results. Not only were my curls super defined, but they were also soft, bouncy, and full of volume. The real test of a styling product for me, though, is how well they hold. I opt for a gel because I know I’ll get at least three or even four days of wear before my hair becomes a frizzy, undefined mess. The Prose curl cream doesn’t have quite the same hold as my gel of choice, but I was still able to get a solid three days before I had to tie my hair back until my next wash. All around, the curl cream (and the rest of the Prose lineup) was a huge win.


After a few weeks of use:

If you’ll allow me a moment to brag, my hair is, without doubt, one of the things I am most proud of about myself. I have spent years upon years perfecting my routine and taking better care of my hair than pretty much anything else. As a result, my hair is probably the healthiest it can be. It’s long and strong and everything I wanted it to be when I first set out on my natural hair journey at the ripe age of 18. That said, after using Prose for just a few weeks, I’ve already noticed a few changes. It’s a lot softer (I credit that to the curl cream I’ve been using instead of gel), it has crazy volume (again, not being weighed down by a mountain of gel certainly helps), and detangling in the shower is a breeze with the Prose conditioner. In short, I’m having a great time with Prose and haven’t even spared my other products a glance since adding Prose to my routine.


The verdict:

When I said I was a creature of habit, I meant it. But Prose really blew me away. I love knowing that the products I’m using are made just for me. While I consider myself an expert on my hair, I love that Prose offers so many resources for my hair and the ingredients in my products—it’s like an entirely fresh start for my hair journey. As for the results—which is what we all really want to know about—they speak for themselves. My goal is for my hair to be stronger, shinier, softer, and more defined. Prose checked all of those boxes and I couldn’t be happier.


Initial thoughts: 

As someone who gets overwhelmed looking at endless hair product options online and in-store, I welcomed Prose’s free consultation. I’d way rather have a personalized routine created for me than spend literal days trying to pick something new. The consultation was a total breeze but thorough at the same time, which I was pleased with, and I really appreciated that I could choose an unscented routine. Since I am ridiculously sensitive to most scents, I try my best to steer clear of them.

When I first received my routine (shampoo, conditioner, and leave-in conditioner), I was a little concerned about the size of the bottles. They are smaller than I’m used to, so I was worried I would have to order more frequently, but after my first wash, I knew that wasn’t going to be an issue. I have tried other brands with clean ingredients in the past, and I had a hard time getting enough suds, which led to me going back in for more product. My Prose shampoo starts to sud right away, so I don’t have to use nearly as much to feel like my hair is actually clean—a total win in my book.

I’m not too picky when it comes to conditioner, but I knew that I needed one that would provide enough moisture and body to my hair while not weighing it down. I do love an after-shower product though, so I was excited to see that Prose recommended I try their leave-in conditioner with a heat protectant up to 450 (!) F. Since I use heat often, that’s a must. After washing and styling my hair for the first time, I noticed how much more full and manageable my hair was. It’s safe to say that the first impression was a good one.


After a few weeks of use:

Immediately, I noticed that my hair was less greasy on day two, so I started to push my wash days off to day three. Then, I pushed to day four and thought, “Who even am I?” Not only did I get back precious time (like so much of it) in the mornings, but I also didn’t have to use heat as often.

I also noticed that my hair wasn’t nearly as dry as it usually is in the colder months, so I didn’t find myself reaching for additional hair masks. I don’t particularly enjoy hair masks, so I was excited about this. I wondered initially why they weren’t in my personalized routine, but after a few weeks using Prose, I realized that I don’t need them when I am using the right products.


The verdict:

Washing my hair has become less of a chore and something that I actually look forward to. Instead of having to wash and style every day, I do it on Monday (providing a nice fresh start to the week) and Friday (to kick off the weekend). Now, I can’t believe I used to wash and style my hair every single day. What a hassle that was.

Excessive grease and lack of moisture were my biggest hair woes, and I honestly don’t have to worry about that anymore. Sure, my hair doesn’t look amazing the day before I wash it, but I work from home and have experimented with different styles that get me to wash day: braids, top knots, and the low bun that all the cool girls are styling these days.

Now that my hair has evolved, I really appreciate that Prose checks in to see what I want to change with my next order. I see myself continuing my routine for the foreseeable future, and I will definitely be trying more products. I can’t wait to get my hands on the hair oil and dry shampoo.


Initial thoughts:

If there’s one area in my life that I don’t pay too much attention to, it’s been the hair care department. When it comes to finding shampoo and conditioner, I typically just go for a generic brand that I pick up on yet another Target run, don’t give it another thought, and then complain that my hair is frizzy, dry, and damaged from far too much heat styling.

Full disclosure: The Prose hair consultation was the first time that I ever even thought to evaluate my current hair situation, and let me tell you: It was eye opening. I had never even considered that environmental factors (UV rays, water pollution, humidity, and wind—Chicago problems) were affecting my hair health and, for the first time ever, I set hair goals (but loved that I didn’t have to do much work at all to make it happen).

First of all, when my order arrived, I fell in love with the packaging alone. Seeing my name on the label ignited that “woah, this literally was made for me” moment, and I got to “work” reading my customized instructions and learning about the formulas curated specifically for my hair needs. I received the Pre-Shampoo Hair Mask to restore overall health and provide long-lasting hydration, a gentle, sulfate-free shampoo, an ultra-color-safe purple conditioner, a protecting and detangling leave-in-conditioner, and a reparative hair oil treatment. Even with just one use, my hair was manageable and free of unwanted frizz, which was so refreshing in comparison to the previous hair system that I was just settling for.


After a few weeks of use:

I used my custom hair system for a few weeks and, in that short period of time, I can honestly say that my hair has never looked better—probably because I’m actually giving it attention and not opting for a one-size-fits-all solution, so I really shouldn’t be surprised that I like it so much. I curated my formula to have a eucalyptus scent and it literally smells like a spa every time I use it, which, results aside, is enough to keep me coming back for more.

I think the system working together has done wonders for my hair over the past few weeks. It’s definitely more shiny and voluminous and, with the use of the purple conditioner, a lot less brassy (praise be). I don’t think I’ve been using it long enough to speak on how it’s affected my shedding and hair growth necessarily, but I can say that my hair seems a lot healthier and manageable than usual, so we’re off to a good start.


The verdict:

For me, using Prose wasn’t just finding a hair system that worked for me—it was an entire experience. I learned so much about my hair from the free consultation and studying my system and finally have an entire routine that I literally never in a million years could have landed on by buying one-off, generic products from the drugstore. I’ve never given my hair so much TLC, probably because I barely had to lift a finger to make it happen, and for that, I’ll recommend this solution to anyone looking to up their hair game.


9 Gorgeous Spring Hair Colors We’ll be Seeing Everywhere in 2022
READ MORE

This post is sponsored by Prose, but all of the opinions within are those of The Everygirl editorial board.


The post We Tried the Haircare Line the Internet Can’t Stop Talking About—Here Are Our Thoughts appeared first on The Everygirl.

I will admit that I become infatuated with many beauty products from love at first test; sometimes, you just know. But only those that stand the test of time—literally surviving what is known as a wear test but also keeping my interest over time—achieve holy grail status and make their way onto my top shelf. So when Kosas launched 36 shades of the Revealer Skin-Improving Foundation SPF 25 to follow the marked success of their Revealer Concealer, I had to know whether it truly lived up to the hype. The verdict? A resounding yes, and this was after testing it in my wrong shade (shade 140 instead of 160). Still, this is my new favorite foundation. Here’s why.


The Rise of Skincare-First Cosmetics

For years, my favorite makeup artists have considered themselves “skincare-first,” with the ultimate goal of creating a healthy base that requires minimal makeup for the desired look. The new Kosas foundation thus joined the upsurge of cosmetics with skincare benefits, which help bring about a cosmetic effect while incorporating elements that are actually good for the skin. “Makeup with skincare benefits is one of the biggest trends in beauty,” said clean cosmetic chemist Krupa Koestline, founder of KKT Consultants. “Consumers are smart and they want to spend money on products that are multitasking and do more than just sit on their skin.” When it comes to foundation, which covers the skin to achieve a more even-looking base, the opportunity to relay some active ingredients becomes even more relevant.


Source: @kosas


The Benefits

“Since foundation is on the skin for hours at a time, it should have some beneficial properties,” Koestline continued. “Depending on the concentration of the actives and the overall formulation of the foundation, some skin types may not need to apply moisturizer [or primer] beforehand.” She pointed out that this speaks to the trend of “skinimalism,” wherein less, more efficient products are preferred. This is absolutely the case with the new Kosas foundation, which does not require the use of a primer beforehand—but more on that to come. So what’s in it?

In addition to the medium coverage it provides, the brand opted to include a bevy of skincare ingredients to make the foundation more efficient by providing correction from the skincare level. Peptides and hyaluronic acid, which attracts water molecules to it, relay a hydrating and plumping effect that can also improve the appearance of fine lines. Barrier-enhancing niacinamide and circulation-stimulating caffeine impart smoothing and brightening. Olive-derived squalane, provitamin B5, and arnica soothe and aid with hydration. And as the final cherry on top, sun protection and blue light protection are afforded thanks to the incorporation of mineral sun blockers and artemisia flower.


How to Apply

I have tested out this foundation in various ways and have my preferred methods of application down to an art. While it does not require a primer beforehand and, actually, as celebrity makeup artist Katrina Klein pointed out, must not be used with a silicone-based primer because its water base will cause pilling, I do typically prepare my skin with a full regimen that includes a moisturizer or even a sheet mask like 111Skin Y Theorem Bio Cellulose Facial Mask ($32) if I have time. My favorite way to prep my skin before application is with Chanel CC Cream Super Active Complete Correction Sunscreen SPF 50 ($55), which leaves the skin almost perfected. Then, I use a damp beauty blender to apply one pump of the foundation (I wear shade Light+ Neutral Olive 160) on my face, continuing to press the sponge and blend the foundation into my skin more than you might suspect it needs (this is an application trick I learned from a celebrity makeup artist in Paris).

Next comes my concealer—sometimes I use Ilia, sometimes I use Shiseido—settling it into my undereyes and any uneven spots with the Anisa Concealer Brush, blush, and setting powder courtesy of the new Saie Airset Radiant Loose Setting Powder.


Review

What stands out about the foundation is how well it stays put without feeling cakey or excessive. With a natural finish—not too matte but not shiny—it imparts coverage that leaves the skin looking even, without separating, for hours. I love that it leaves me looking fresh without creasing or requiring touch-ups throughout the day; I’m shocked every time. But even though it contains mineral SPF, you still have to remember to reapply sunscreen every two hours, which is why I love the dual setting function of Seriously Fab Zinc it Over SPF Mist, a favorite of Kasey Boone, founder of Glow Skincare LA.


The Final Verdict

I also want to note that this brand is just as meticulous about what ingredients it leaves out. Known for being a “clean” and vegan beauty brand, they exclude silicone, mineral oil, talc, fragrance, parabens, sulfates, and phthalates. This is significant for reasons that range from sensitivities as well as concerns related to sustainability and even safety. “Mineral oil and silicones are well-known environmental hazards,” Koestline pointed out, referencing the connection to the petroleum industry and the failure of silicones to biodegrade. “Fragrance, talc, and phthalates [have been] connected to health hazards and are not necessary in a formula for efficacy or long wear. I am all for leaving those out.”

As a reminder, everyone is entitled to what they choose to apply to (or leave off of) their faces; we are not here to judge! You have probably noticed that my preferred application of this wonderfully clean formula is preceded by a CC cream that is not clean, containing a chemical sunscreen et al. But if you are partial to the clean and vegan niches, Kosas’ foundation represents a class of product that lives up to its counterpart while delivering fantastic results. Regardless of where you stand in the ingredient debate, this foundation is a must-try.


This Concealer Hack is the Only Reason I Look Alive Every Day
read more

The post We Haven’t Been This Excited About A Foundation in A While—and it Lives Up to the Hype appeared first on The Everygirl.

As much as I love and have perfected running a curling iron through my hair to produce a quick-styled head of curls, I can’t help but cower in fear at the smell of burning hair or coming to the realization that I’ve run out of my favorite heat protectant. I have pretty thick, long hair, and keeping it healthy at this length is one of my top priorities. Enter: heatless curl methods. I’ve tried heatless curling methods before, mostly in high school or middle school with plastic straws (yikes) or scarves and robe belts. The results were never super great or long lasting, but a quick search today results in so many new methods and ideas.

I was mesmerized by the mesh curlers I was seeing on TikTok and wanted to give the old methods I used a new try. Most of the videos I watched said to try these methods out on damp, washed hair, but I noticed that I got better results the dirtier my hair was and it lasted way longer. 

Below, I embarked on a journey of trial and error, tears, frustration, success, and triumph. Follow along to see what curl methods worked best for me and what I would recommend most. 


Type of Curl: Crimped Waves
Ranking: 1/5

I did half of my whole head with these before I realized that I had a whole other half of my hair left and no more curlers. Oops! These mesh curlers were definitely not thick-hair-friendly. I had to use extremely small strands of hair to thread through. With the hook that came with the set, you thread your hair through the curlers and pull through for them to sit neatly in the mesh. It took a little tinkering, but it was easy to catch on after a couple of tries. I ended up braiding the remaining hair that was left out of the curlers. I also had to double up because the curlers were too short for my long strands (that’s on me though).

These weren’t very comfortable to sleep in, but compared to the other curlers I used, they were only slightly better. The results were underwhelming, which disappointed me because I was most excited to use these curlers. Some strands of hair seemed more crimped than others, though I put them all on the same. If you want to achieve this look, I’d suggest just braiding your hair and sleeping in it overnight instead of using this method (a single dutch braid and some hairspray is my personal favorite). However, if your hair is finer or shorter (as opposed to thicker or longer), I do think this method would be a bit more successful and fun to explore.


Type of Curl: Tight and Bouncy Curls
Ranking: 2/5

I cried when trying to figure these out. I was so excited to try these when they came in the mail, but it took me multiple days and countless hours into the night. But they did come in a cute clear carrying case adorned with tropical flowers, and I’m a sucker for cute packaging.

Initially, I hooked a piece of hair at the top of my head to the hook that came with the curlers. Yes, a hook! You needed a hook to essentially thread your hair through the hollow curlers. It was not simple to understand, at least for me. I learned quickly that the more hair you used in your strand, the less it works, as all your hair will get bunched up and stuck halfway through the tube. This was a major issue because I have a lot of hair. If I had to use extremely tiny strands of hair, I knew I was going to have to use an excessive number of curlers.  But nevertheless, I dove right in.

Another one of my initial issues was that when I pulled my hair through the curler, it literally felt like I was being scalped. Finally, after a night’s rest and multiple videos sent to my best friends filled with tears and deep-breathing exercises, I dove back in. I wet my hair a bit and put some leave-in conditioner in to make it easier to work with. Instead of just hooking my hair in all willy-nilly, I twisted the root and hooked the twisted piece at the top of my head in the hook, then threaded the strand through horizontally instead of vertically. It worked! It took me 30 minutes to do one half of my head and 10 to do the other after I got the hang of it. I had maybe 30 curlers in my head at least.

After going through all that, I was at the point where I’d rather just reach for a 0.5-inch curling iron. I don’t know what was worse: sleeping in these curlers or trying to figure them out. If I had to pick, I think I’d say sleeping. It was impossible to get comfortable—there was practically no use for a pillow. The minute I woke up, I was ripping them out. I couldn’t do it fast enough. But as much as I hated the process, I really loved the results. My mom has a head full of curls, and these looked exactly like her tresses I have always envied. I separated them and combed through them a bit, and they were so bouncy and full. I do wish that I had also curled my bangs because they looked weird compared to my really curly head. I’m not sure I would do these curls again, but after the reception of everyone around me, maybe I’d reach for the difficult spiral curlers again. The curls were beautiful, but unless I really, really wanted these curls for a specific day or look, the process was just way too much.


Type of Curl: Loose Waves
Ranking: 3/5

This method took some figuring out. All the videos I watched made it look so easy and simple, with results similar to loose waves. I clipped the sock to my head and began. Essentially, all I had to do was French-twist my hair around a sock on each side of my head, with the toe side at the top of my head and the opening at the bottom. Most videos suggested I use a fuzzy sock, but I found I ran into issues with slipperiness. I also think my sock was too small. After twisting your hair in each sock on each side, you’re supposed to grab the end of the sock and pull it over your sock braids to secure them. This didn’t work out so well for me, so I just went to bed and hoped for the best, not feeling too confident about what the results were going to look like. The next morning, it was no surprise that the socks were almost out of my hair. I removed them and found my hair to be a mix of waves, a curl or two, completely straight pieces, and frizzy, messed-up strands. It mostly looked like I slept in a bun where half my hair produced some cute waves and the other half was sitting weird under where it was secured and got all frayed.

It didn’t look bad and I still went out for brunch with a friend, but with the wind and 20-degree weather, the curls/waves didn’t really last. I don’t think I’d try this method again unless I’m figuring out a new way to refine and perfect it.


Type of Curl: Wand-like Waves
Ranking: 4.5/5

I’d tried this method before a while back, but I somehow ended up with two giant Princess Leia-esque buns on the side of my head that were a pain to sleep in. After watching a couple more tutorials, I went back in and retried this method, where you use the belt of a robe to give yourself perfect waves. Using the robe belt was basically like a more secure version of the satin-tube method I also tried out.

The trick with this one was to use a claw clip to secure the belt to the top of your head (clips are key with these unconventional methods!). After securing your clip to the top of your head, you French-twist your hair on each side of your face around the robe. I was able to twist my hair around the belt tighter than the satin tube and secure it in two mini space buns at the nape of my neck. When I woke up the next morning, the “buns” were still perfectly intact, and no hair was hanging out as they did with the silk tube. Taking the belt out, I saw quickly that these curls were way different from the tube curls. They were tighter and there were a lot more. It also gave my hair tons of volume, which I was pleasantly surprised about. With a quick spritz of dry shampoo, I was on my way for the day.

These curls lasted until very late into the night. You know when you’re about to shower and your hair looks the best it’s ever looked? That’s what happened with these. I didn’t even want to wash my hair! Though these curls were really pretty, I still think that the satin tube was easier and comfier to sleep in, but if you’re looking to get drop-dead gorgeous, heatless curls with something you most likely have, this one is one I’d highly suggest. 


Type of Curl: Beauty Queen Curls
Ranking: 5/5

I’ve seen this curl method all over TikTok lately. Most demonstrations produce beautiful curls that look like a salon professional did it. You wrap your hair around the silk tube French-twist style, sleep with the sausage-like tube overnight, and remove it in the morning. The initial process is almost too easy; it takes maybe five minutes or less. I did notice that my hair was slipping off the tube after first putting it on, but it’s not difficult to remove it and wrap it again more tightly. Waking up the next morning, the tube was practically hanging off of me like a cape. This made me nervous because I didn’t think the curls would still turn out as good. But thankfully, I was proven wrong.

After removing the tube (which wasn’t difficult at all) and shaking out my curls, I saw that all the TikToks were right. I combed through with my fingers, and my hair looked so silky with perfect beach waves. I did notice, however, that because the front pieces of my hair that frame my face fell off of the tube, most of the curls only fell at the bottom of my hair. That was OK, though, because I still had perfect curls that took the least amount of effort.

One thing I was wary about with heatless curls is knowing that they don’t last as long throughout the day as curls used with heat. Thus was the case with these, unfortunately, as the curls were flat and gone after a busy day out and about. Nevertheless, when I stayed in the whole day and just did errands around my apartment, the curls lasted all day. With these, it’s really the elements versus your hair. I had sent my sister a Snapchat of the results early in the day, and she texted me, “OMG, your hair looks so good today, like a beauty queen.” If it’s sister-approved, you know it’s a good product. I see myself using this every day. 


Can’t Get Your Hair to Hold a Curl? Here’s What to Do
read more

The post I Tried 5 Popular Heatless Curl Methods—Here They Are, Ranked appeared first on The Everygirl.

If you’ve never touched self-tanner before, you’ve probably heard the horror stories: orange hands, streaky legs, a tan that faded before you even left the house, missed spots. Everything you read about self-tanning will probably make you never want to try it, but here’s what they won’t tell you: There are many tips and tricks to getting the perfect, glowy self-tan (and sometimes, it all comes down to a good product).

Tanning expert Jordan Cook gave us a few pro-level tips for the best tan ever this summer, and we’re sharing our top 20 best self-tanners no matter what you’re looking for.

Regardless of your skin type, everyone can benefit from a gradual tanner, Cook explained. “The beauty of a gradual tanner is that you are in control of your shade,” Cook said. “You can apply as little or as often until the product becomes the shade of color you desire. Whether it’s a mousse, water spritz, or tanning drops, each you can tailor to suit you.”

If you’re unsure which type to use, it all depends on personal preference. Mousse tanners are typically the deepest in shade while tanning waters are easy to apply and typically less streaky. Gradual tanners are lighter coverage and have a more natural look. As for which shade to buy, Cook made it simple: “If you are a fair to medium natural skin tone, then go for the medium shade; this will look most natural on you. If you have a more olive, darker skin tone, go for the dark.”

If you have a deeper skin tone, don’t fret—self-tanning products are for you too! You can use self-tanners to even out your skin tone, add a golden glow, and enhance the natural melanin already in your skin.


Before You Tan: 

Cook explained that you want a clean canvas before you tan if you want it to look flawless and even, so you should always shower and remove any leftover tanner you might have. You can use a tan remover to get any of the hard-to-remove tan off, and then always exfoliate. You’ll want your skin as clean and soft as possible before you apply a tanner.

You should also make sure to moisturize beforehand to make sure your tan is going onto hydrated skin. “Make sure you add a pea-sized amount of moisturizer to your hands, feet, ankles, knees, elbows, and any other drier areas to avoid tan clinging there a little too much,” Cook said.

After you’ve tanned, Cook recommended this genius dry shampoo hack. Spray a light dusting of dry shampoo or baby powder on your body after you’ve applied your tanner, and it’ll take away any sticky residue, prevent transfer onto your bedding or clothes, and prevent you from sweating while the tan develops so it doesn’t interfere with the tan.

Buttah

Whipped Body Butter

Apply a thick body butter to your elbows, knees, hands, ankles, and anywhere that your tanner usually gets streaky. Avoid moisturizing your whole body before applying self-tanner so you get the most out of the color.


The Best Self-Tanners of 2022:

Best Overall

Tanologist Express Tan Mousse

This is our editors’ #1 favorite self-tanner on the market. It’s affordable, never looks orange, and has a mild, tolerable scent. When applied with a mitt or glove, the result is never streaky. This tanner also comes in three shades to match various skin tones and depths of color. It looks just like you spent a Saturday laying out in the sun, just without the skincare worries.

Best Gradual Tan

Bondi Sands Everyday Gradual Tanning Milk

When you’re looking for a tanner to just build off your natural skin tone and give you a light tint, a gradual tanner is the way to go. This one is our favorite, coming in under $20 with a light scent and a natural-looking tan that builds slowly. Use this as your daily moisturizer for a few days, and you’ll notice a light tan that blends right in with your natural skin tone. Tip: You can also use gradual tanner to prolong your tan (both fake and any color you may naturally get from sitting out in the sun).

Best Facial Self-Tanner

Tan-Luxe The Crème Gradual Self-Tanning Face Moisturizer

If you're an avid user of self-tanner, you know the struggle of a tan body and bare face all too well. Using your body self-tanner on your face is a risk most of us with acne-prone or sensitive skin aren't willing to take, but luckily, this product came on the market. This gradual tanner is suspended in a luxe facial cream you can apply nightly. Not only does it leave your skin moisturized and bouncy, but the tan is also noticeable without looking artificial. It never gets orange and doesn't get streaky, even on the neck and ears (the best areas to apply on to make sure your tan looks natural and blended).

Best Tanning for Your Face

St. Tropez Self Tan Purity Bronzing Water Face Mist

Editor's note: "Anyone who self-tans knows that your face fades first, so I spray this on after cleansing, and it magically turns my face into the most natural-looking fake tan I have ever seen in my life. It's better than the Isle of Paradise Tanning drops, it's better than whatever you're using now—it never looks muddy or overdone but makes you look like you truly spent the afternoon in the sun. This is probably my 10th bottle and I will always repurchase it. This is in my top five favorite beauty products, no questions asked. Spraying a clear water on your face and it turning into the perfect, even tan sounds too good to be true, but I promise, it is not." —Madeline Galassi, Fashion Content Manager and Associate Editor

Most Popular at Sephora

Isle of Paradise Self Tanning Drops

These flew off the shelves when they first entered Sephora. These tanning drops have over 2,000 reviews and still constantly go in and out of stock. Why do people love them so much? They give a customizable tan: Add one drop to moisturizer for a light tint or a few for a full fake bronze. Tip: Use these on the areas that are hard to tan like your ears, tops of the feet, knees, elbows, etc.

Easiest to Apply

Tanologist Express Tan Water

Editor's note: "When I first started using this, I had never used a self-tanner before, so I admittedly didn't even rub it in, and you know what? It didn't look half bad. Then, I upgraded to an old sock. I didn't use a real tanning mit with this until I almost used up the bottle, and my tan always looked great. I never got streaks. Ever." —Beth Gillette, Beauty Content Manager and Associate Editor

Best Self-Tanners for Beginners

St. Tropez x Ashley Graham Ultimate Glow Mousse Kit

If you've never touched a self-tanner in your life, Ashley Graham partnered with the self-tanner gods at St. Tropez to bring us the ultimate self-tanner kit for beginners. The results? Glowy, moisturized skin (thanks to rosehip oil and hyaluronic acid).

Best Affordable Option

Jergens Natural Glow Instant Sun Self Tanner Mousse

You don't have to spend a lot to get a good self-tanner, and we all know that from stealing our mom's Jergens Natural Glow moisturizer in high school. Enter their self-tanner. It has a tropical scent and dries in 60 seconds.

Best for Deep Skin Tones

Loving Tan Deluxe Bronzing Mousse

Loving Tan is loved by those with medium to deep skin tones because they actually provide a tanner that goes dark enough rather than stopping at a light/medium skin tone. For medium skin, you can add a gorgeous, glowy tan with this, and deep skin tones will look evened out and bronzed.

Best for Fair Skin

Tan-Luxe Illuminating Gradual Tan Lotion

If you have fair skin, a gradual tanner is the best way to get a light, natural tint to your skin without looking too intense or orange. As far as gradual tanners go, this one is top tier. Made with vitamin E and aloe, it keeps your skin moisturized and smooth while adding a hint of color to your skin over time. Plus, it's the best to apply to your skin before a beach day, thanks to its glowy finish.

Best for Olive Skin

St. Tropez Self Tan Classic Bronzing Mousse

St. Tropez revolutionized self-tanning for a reason, and it's because their products are damn good. Their classic tanner has olive skin tones down pat, leaving you with a golden glow that isn't anywhere near orange territory.

Best for Acne-Prone Skin

St. Moriz Advanced Pro Formula Tan Boosting Facial Serum

If normal self-tanners tend to break you out, you can count on this to be your new BFF. Made with soothing aloe and glycerin and dermatologist-tested, it's a lot gentler on the skin than others on the market, making it ideal for those who are worried about acne.

Most Long-Lasting

Vita Liberata pHenomenal 2-3 Week Tinted Tan Mousse

Self-tans historically fade fast—until this one stepped in. This tanner is meant to last double the time of your other self-tanners, so if you're looking for something that will last you a while, look no further. Because you'll use it fewer times, using up this bottle will take a while too, making the higher price point feel a bit more manageable.

Best Smelling Self-Tanner

St. Tropez Self Tan Purity Vitamins Bronzing Water Body Mist

Self-tanners aren't exactly known to be the best perfume. If you can't bear to handle the smell of self-tanner, this self-tanner will give you exactly what you're after: no scent. You can't smell anything when it's on your body, and when you're applying, it's the most mild scent our editors have ever come across.

Most Low-Maintenance

Tarte Brazilliance Overnight Mask Gradual Self-Tanner

Don't feel like self-tanning but have an event coming up? Put this on, sleep, and wake up with gorgeous tan skin. It's easy as that.

Best for Dry Skin

Tanceuticals Self Tanning Body Lotion

If self-tanner typically dries out your skin, look out for this one, containing moisturizing ingredients like mango butter, vitamin E, and acai berry.

Quickest Fake Tan

Bali Body 1 Hour Express Tan

For the days you have somewhere to be quick, this will get you the tan you desire in about half the time as other tanners. Other tanners can take up to six hours (usually overnight) to develop, whereas this can develop to a full bronzey color in just one hour.

Best On-The-Go Tan

Dr. Dennis Gross Alpha Beta Glow Pad - Self Tanner

Bring this in your carry-on for any trips this summer. These towels are easy to use and make keeping up the longevity of your tan (maybe the spray tan you splurged on before you left) a breeze.

Best Fake Tan If You Hate Self-Tanner

Vita Liberata Body Blur Instant HD Skin Finish

If you hate self-tanner but like to look bronzed and glowy in the summertime, this is the best on the market. Loved by celebrities and influencers like Jackie Aina, this body makeup gives a blurred look to your skin with a radiant finish. Use it on your legs, arms, shoulders, back—you name it. Plus, it comes in four shades that can be loved by all skin tones.

Best Glowy Body Bronzer

Fenty Beauty Body Sauce Body Luminizing Tint

If you'd rather just add a glow to your skin than self-tan, a body luminizer is the way to go, and of course, Rihanna gave us one that is transfer-proof, sweat-proof and water-resistant. Hello, tank top season!


Tools:

St. Tropez

Double Sided Luxe Tan Applicator Mitt

A good tanning mitt is a must if you want a glowing, even color without streaks. We love this one because it's double-sided to make it easier to apply self-tanner across your whole body, and the velvet material makes it super soft against your skin and helps the tanner always apply with ease.


I Constantly Get Compliments on My Skin—Here Are the 3 Products I Recommend to Everyone
read more
Everything I Use to Get Glowing Skin for Summer
read more

The post The Best Self-Tanners to Pretend Like You Just Got Back From Vacation appeared first on The Everygirl.

Author Name

Contact Form

Name

Email *

Message *